Get started with RelayPlan
Welcome to RelayPlan – a lightweight ERP for construction and project-based companies. This guide takes you from the first login to the first results in a few steps: add users, cost centers, stock, and track hours and costs.
 RelayPlan login page
First login & profile
- Open https://relayplan.app/login and sign in.
- Open the profile menu (bottom-left) and choose Settings.
- Review basic info (name, email) and set the language.
Navigation & interface
The left menu shows all modules. Module availability depends on your selected plan.
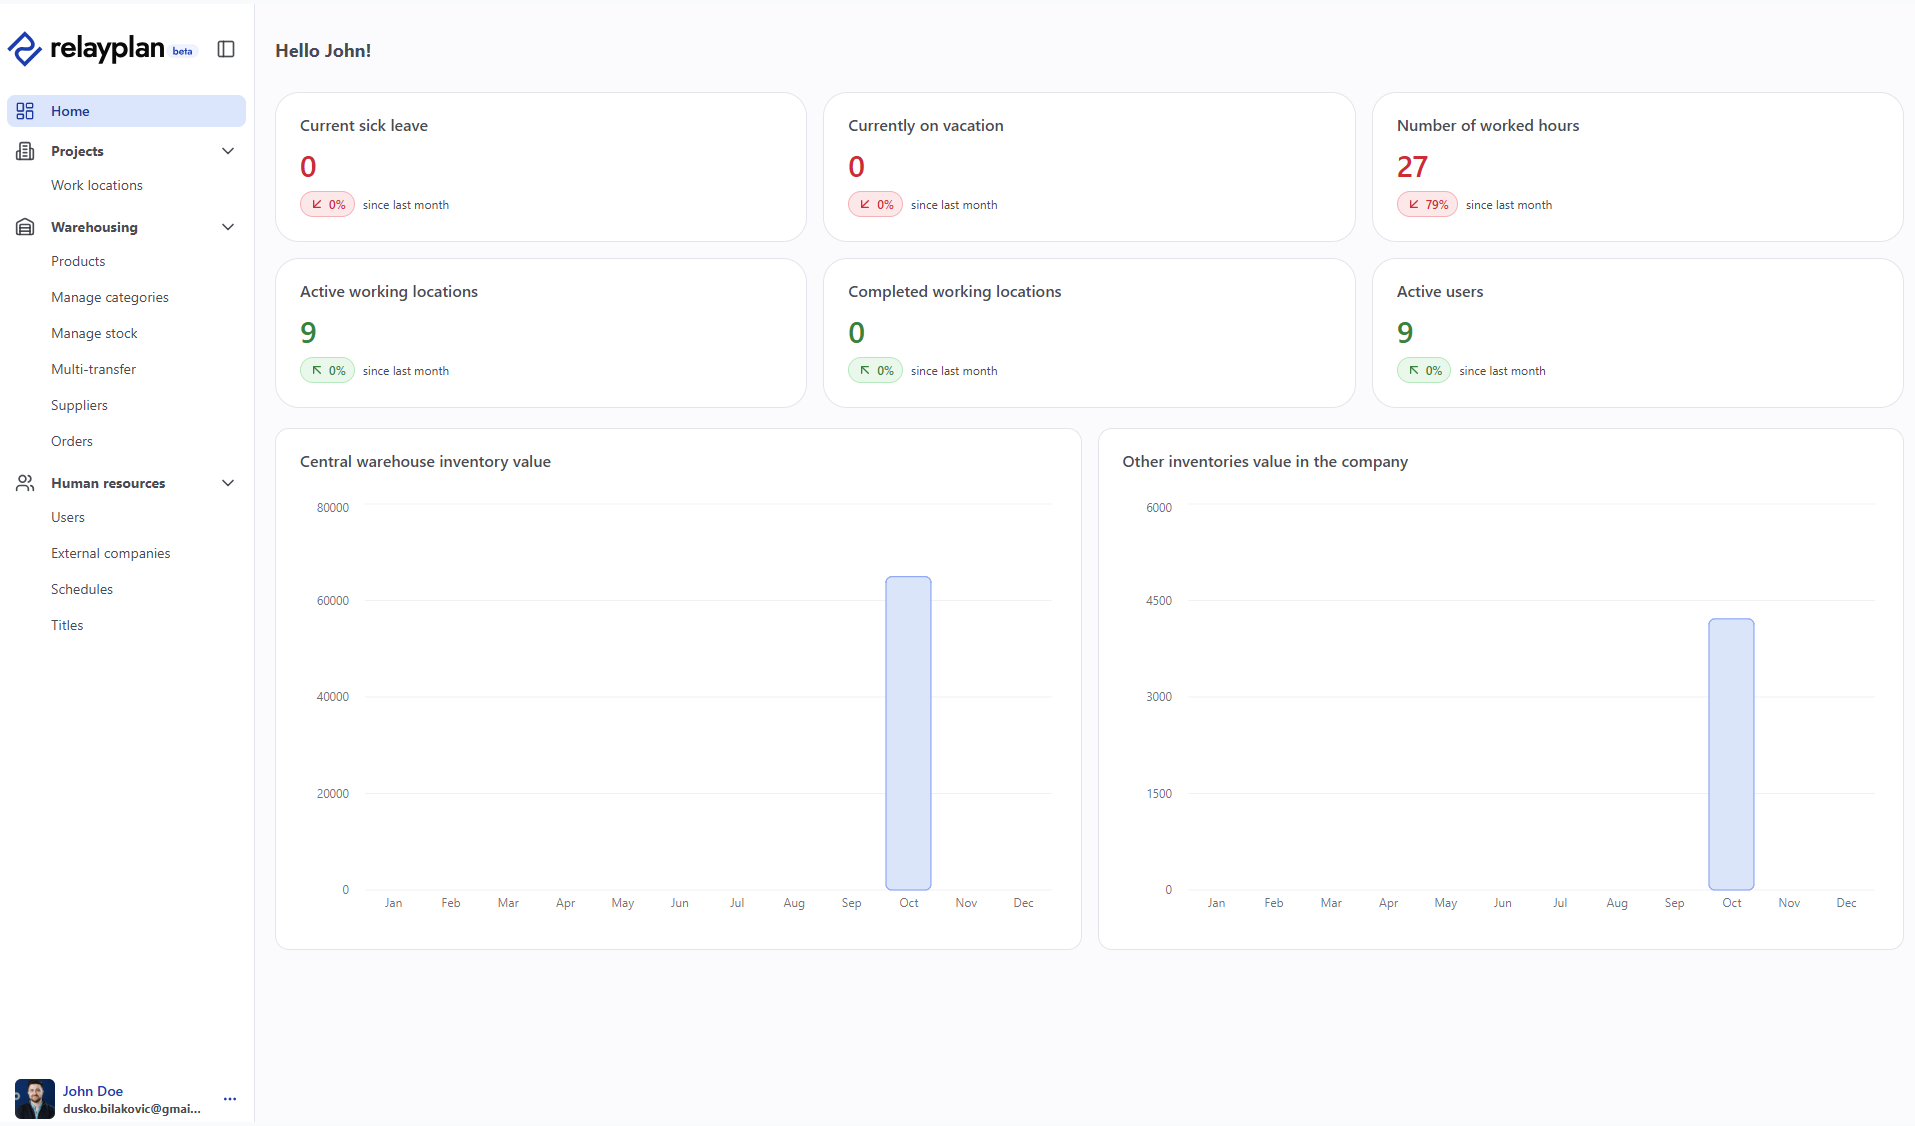 Interface
Users & roles
The HR module gives you a complete view of your team—from basic details, contracts, skills, and roles to availability, absences, and work history. The system also supports recording safety trainings, medical exams, and vacations. Digitizing these processes reduces time-consuming document searches, reminds you about document validity, and increases legal compliance and internal organization.
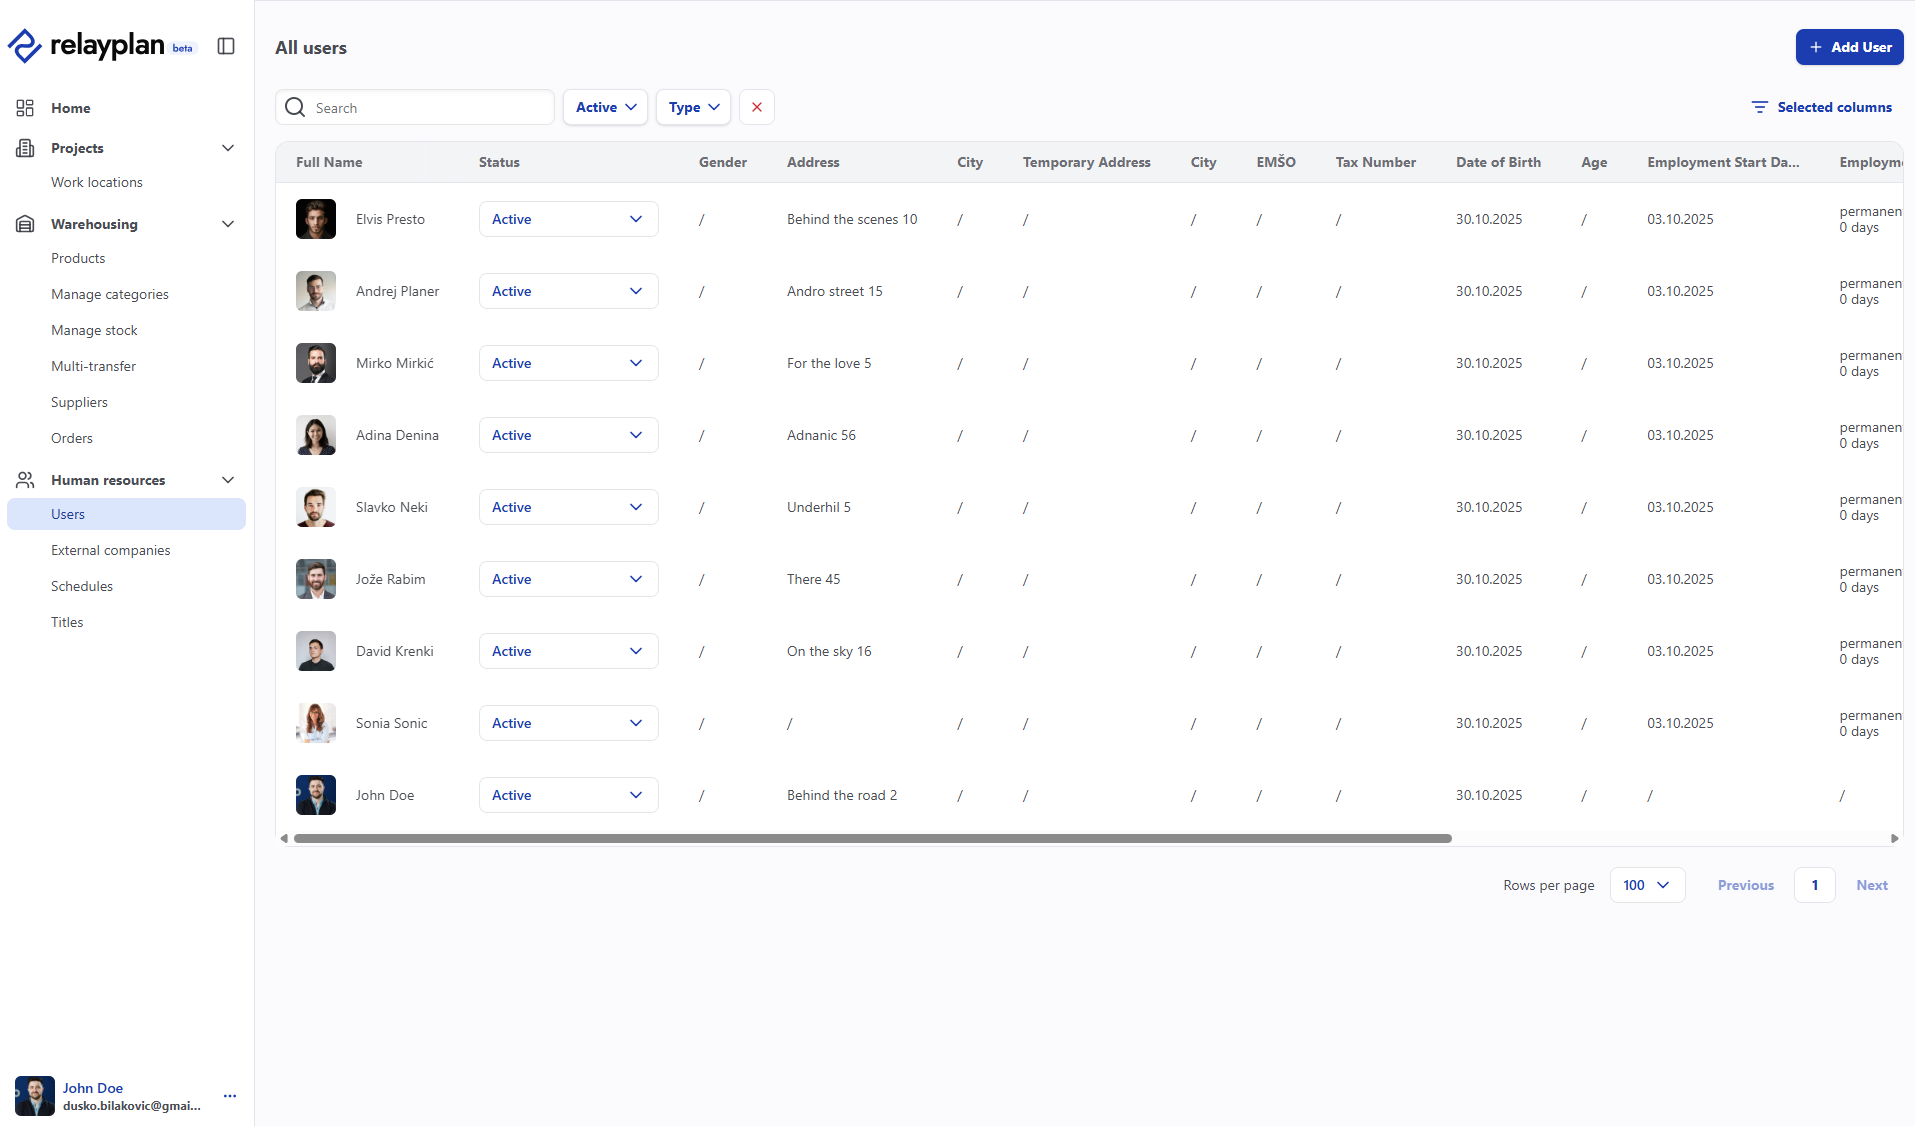 All users
Add a user
- Open HR → Users.
- Click Add user and fill in the details.
- Select a role (administrator, HR manager, team lead, stock manager, worker).
- Save. The user receives an invite (if enabled).
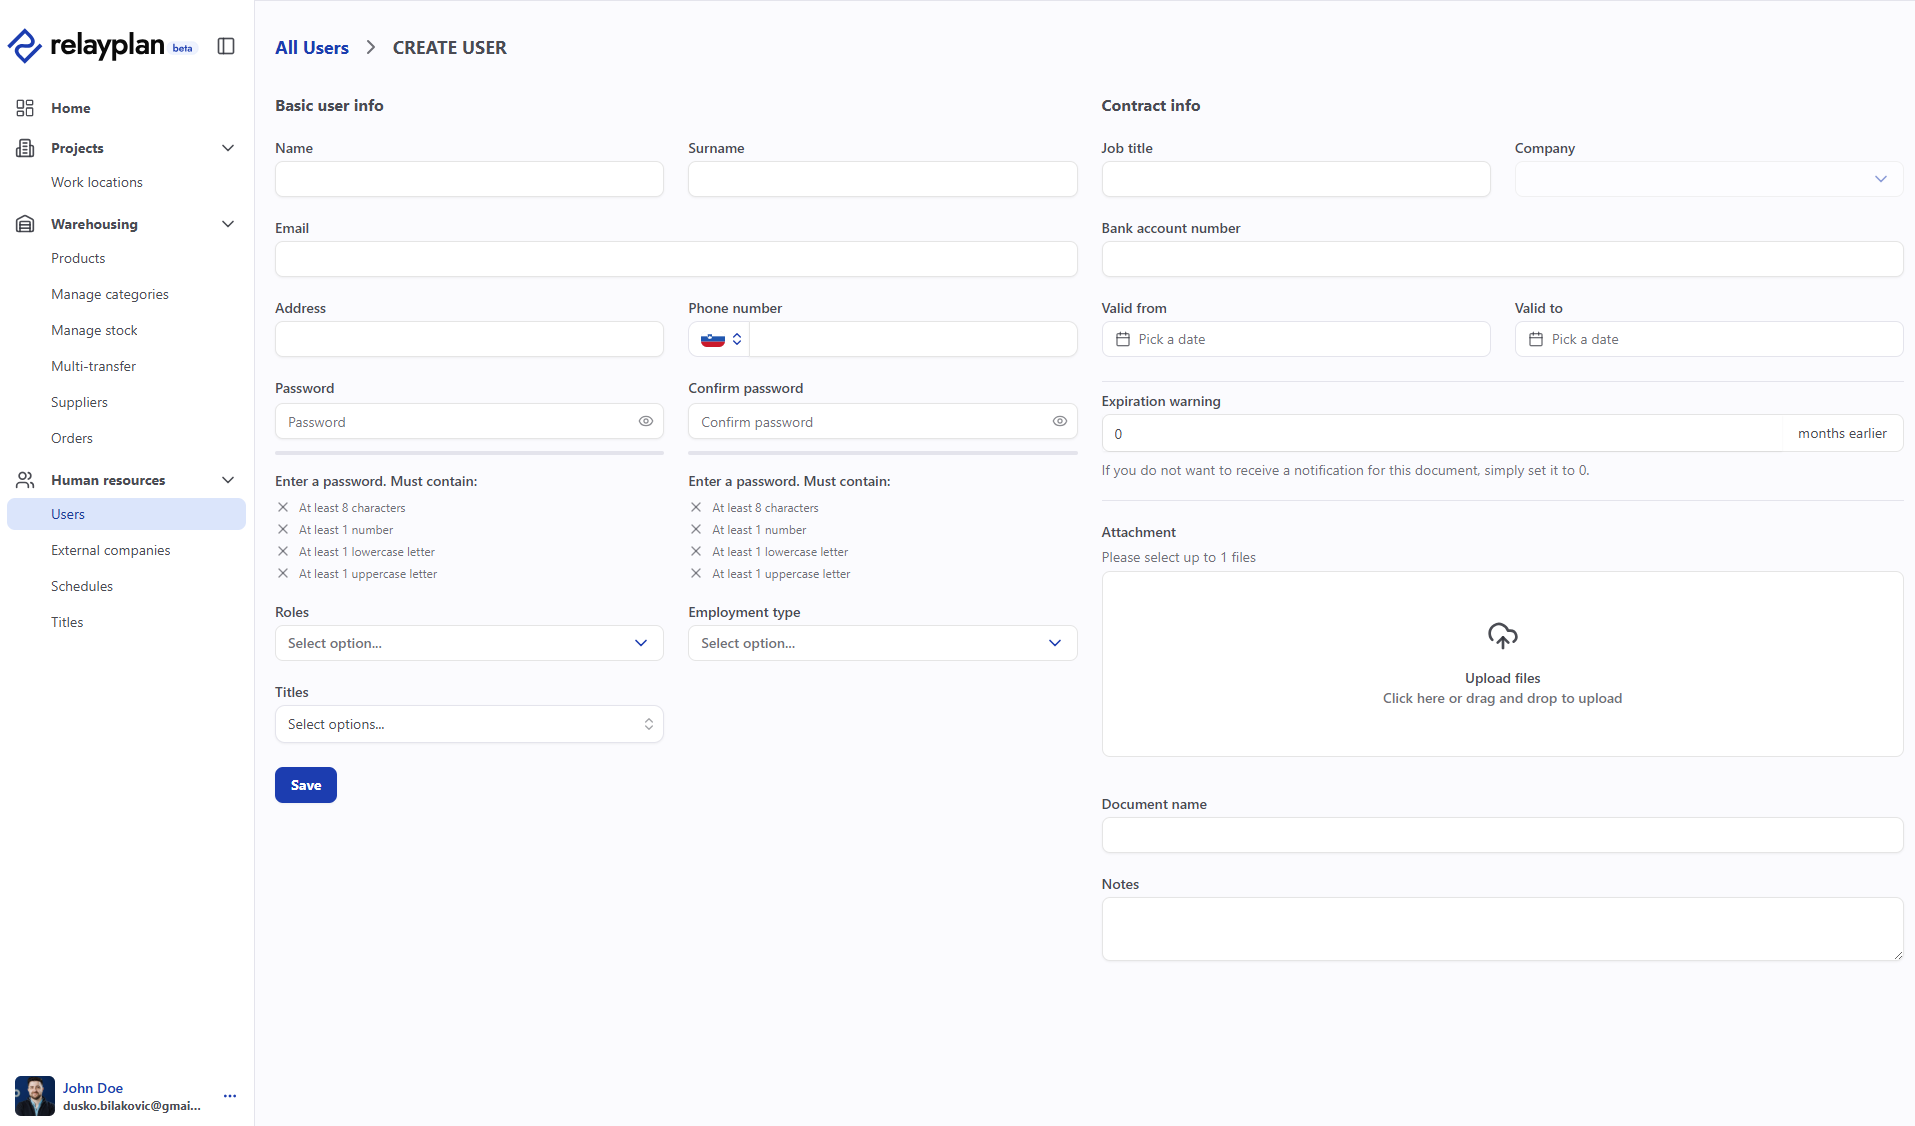 Add user
Cost centers (projects)
Each cost center or project has its own dynamics, deadlines, needs, and costs. The projects module centralizes all activities—from initial setup and allocation of stock and resources to tracking costs, hours, and stock. With a clear structure, responsibilities, and linked data, you can act on time and optimize resources, reducing admin load and improving communication between departments and field teams.
A cost center aggregates costs, hours, and materials. Name it clearly (e.g., “FTTH – Vodnikova – 2025”).
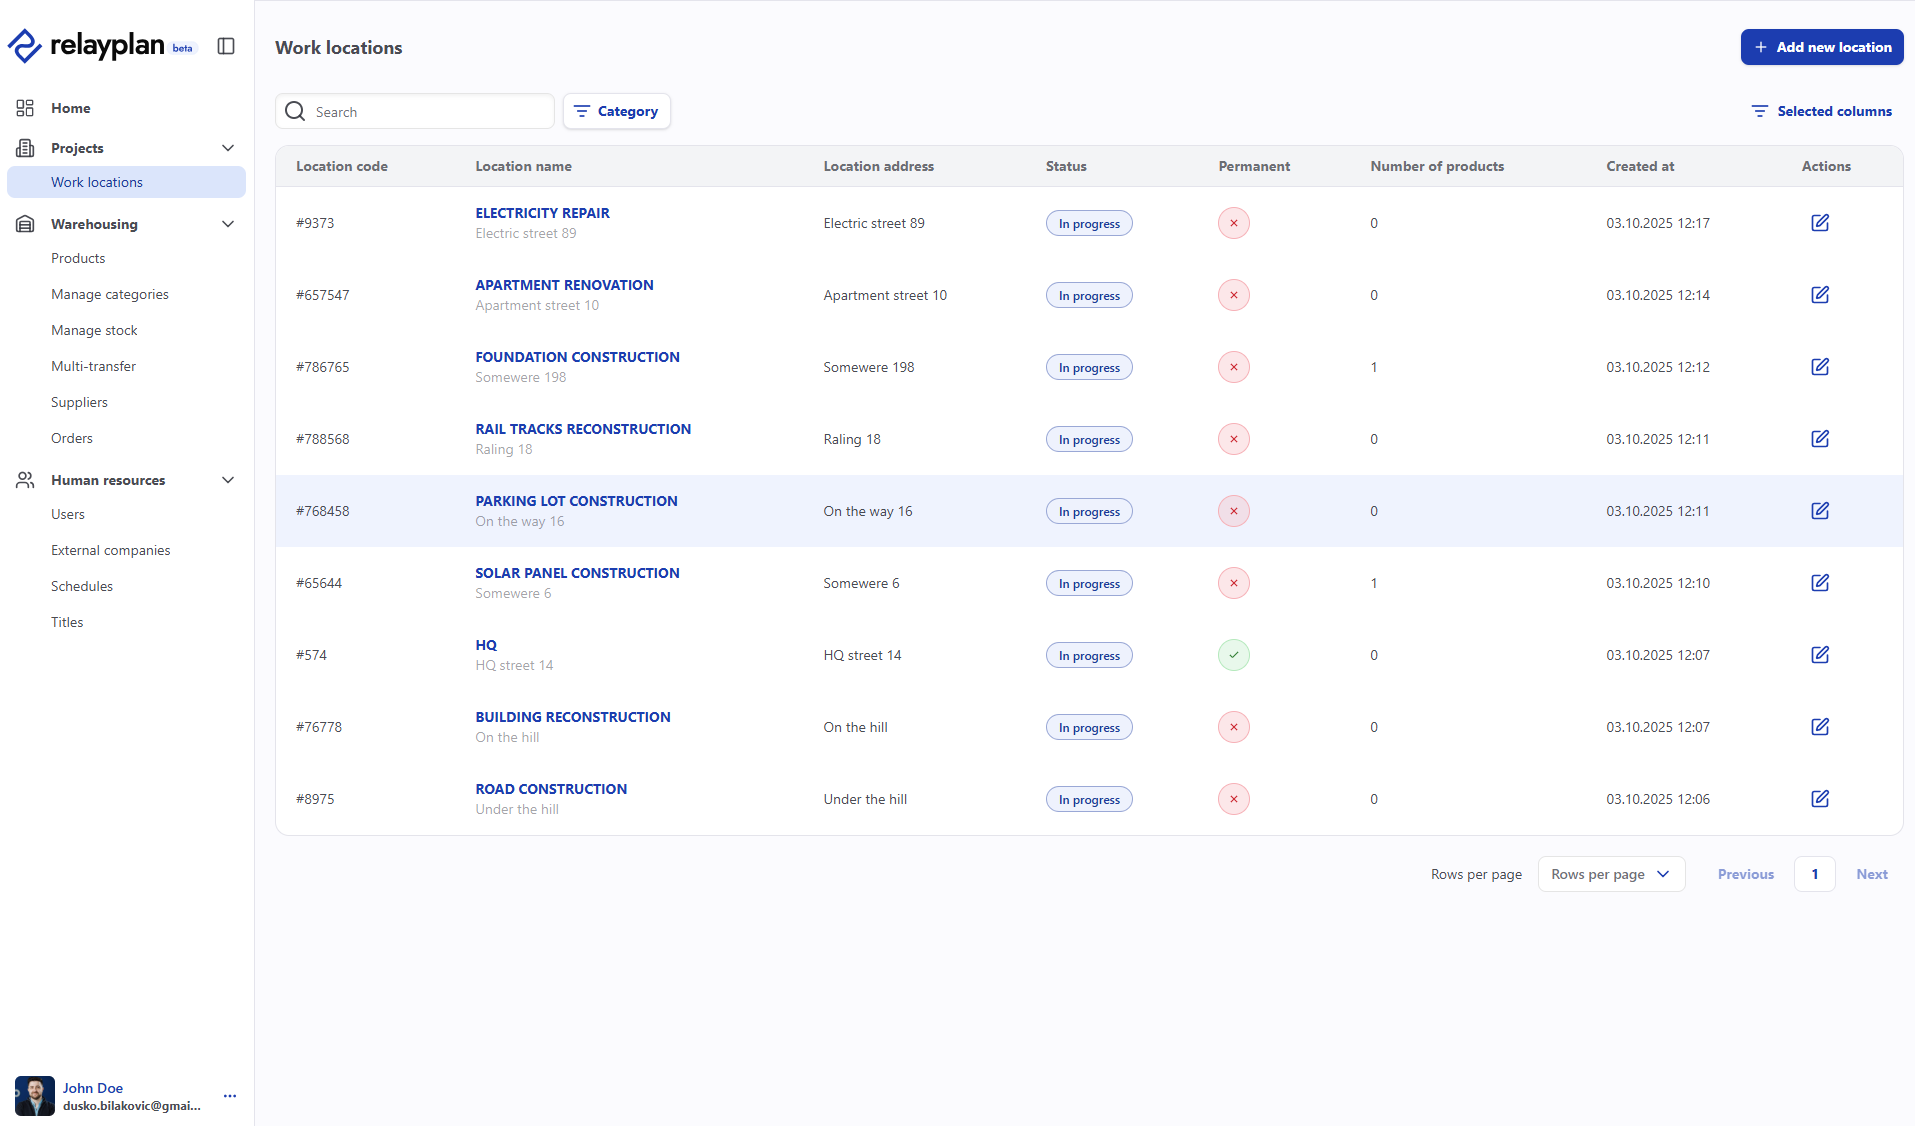 Cost centers
Create a cost center
- Open Cost centers and click Add new location/cost center.
- Enter name, code, and address.
- Mark whether the cost center is permanent.
- Save.
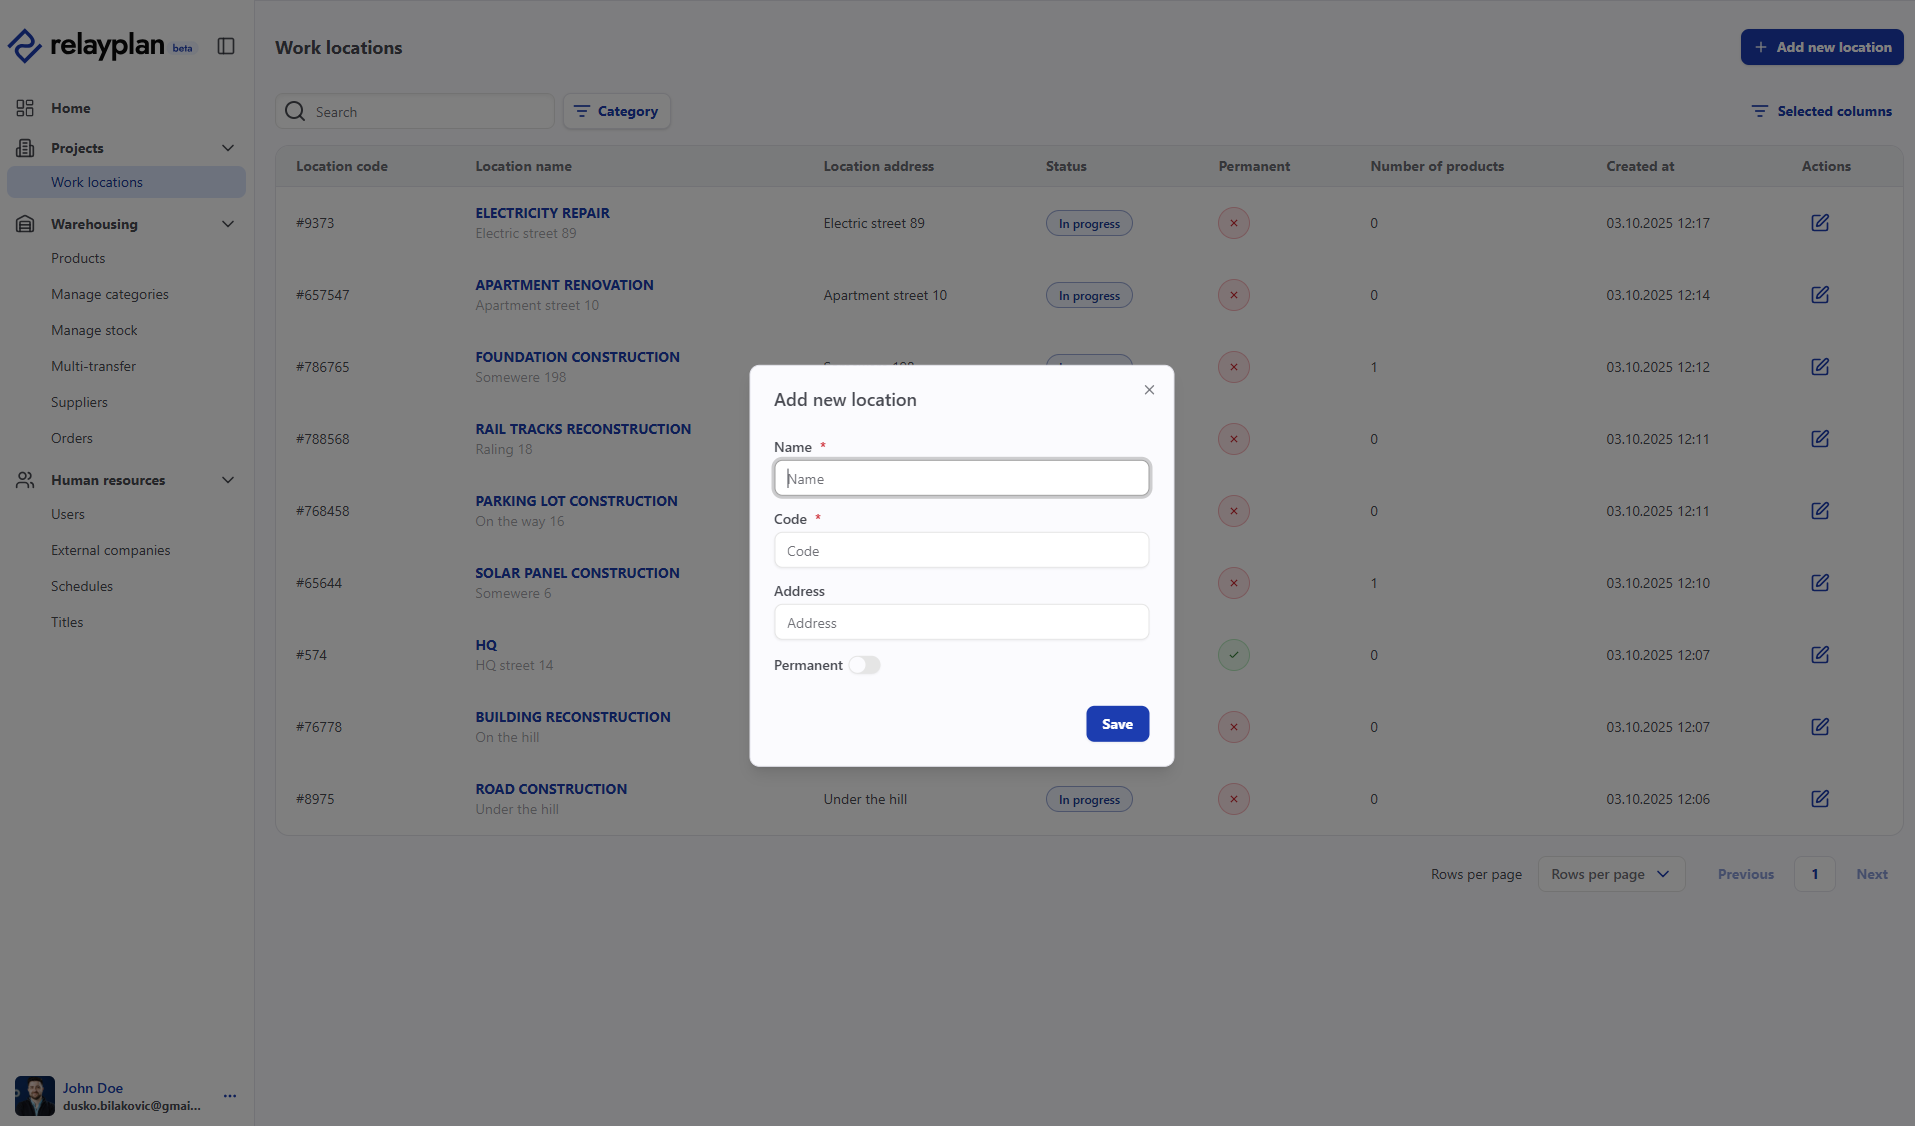 Create cost center
Hours (time tracking & review)
Tracking employee hours can be simple, automated, and paperless. The system supports recording arrivals, departures, lunch breaks, sick leave, and overtime. With the mobile app, employees can “clock in” from remote locations. Project managers can schedule work on the fly, simplifying both planning and later payroll. You’ll always have accurate data for payroll calculations, audits, and internal reporting.
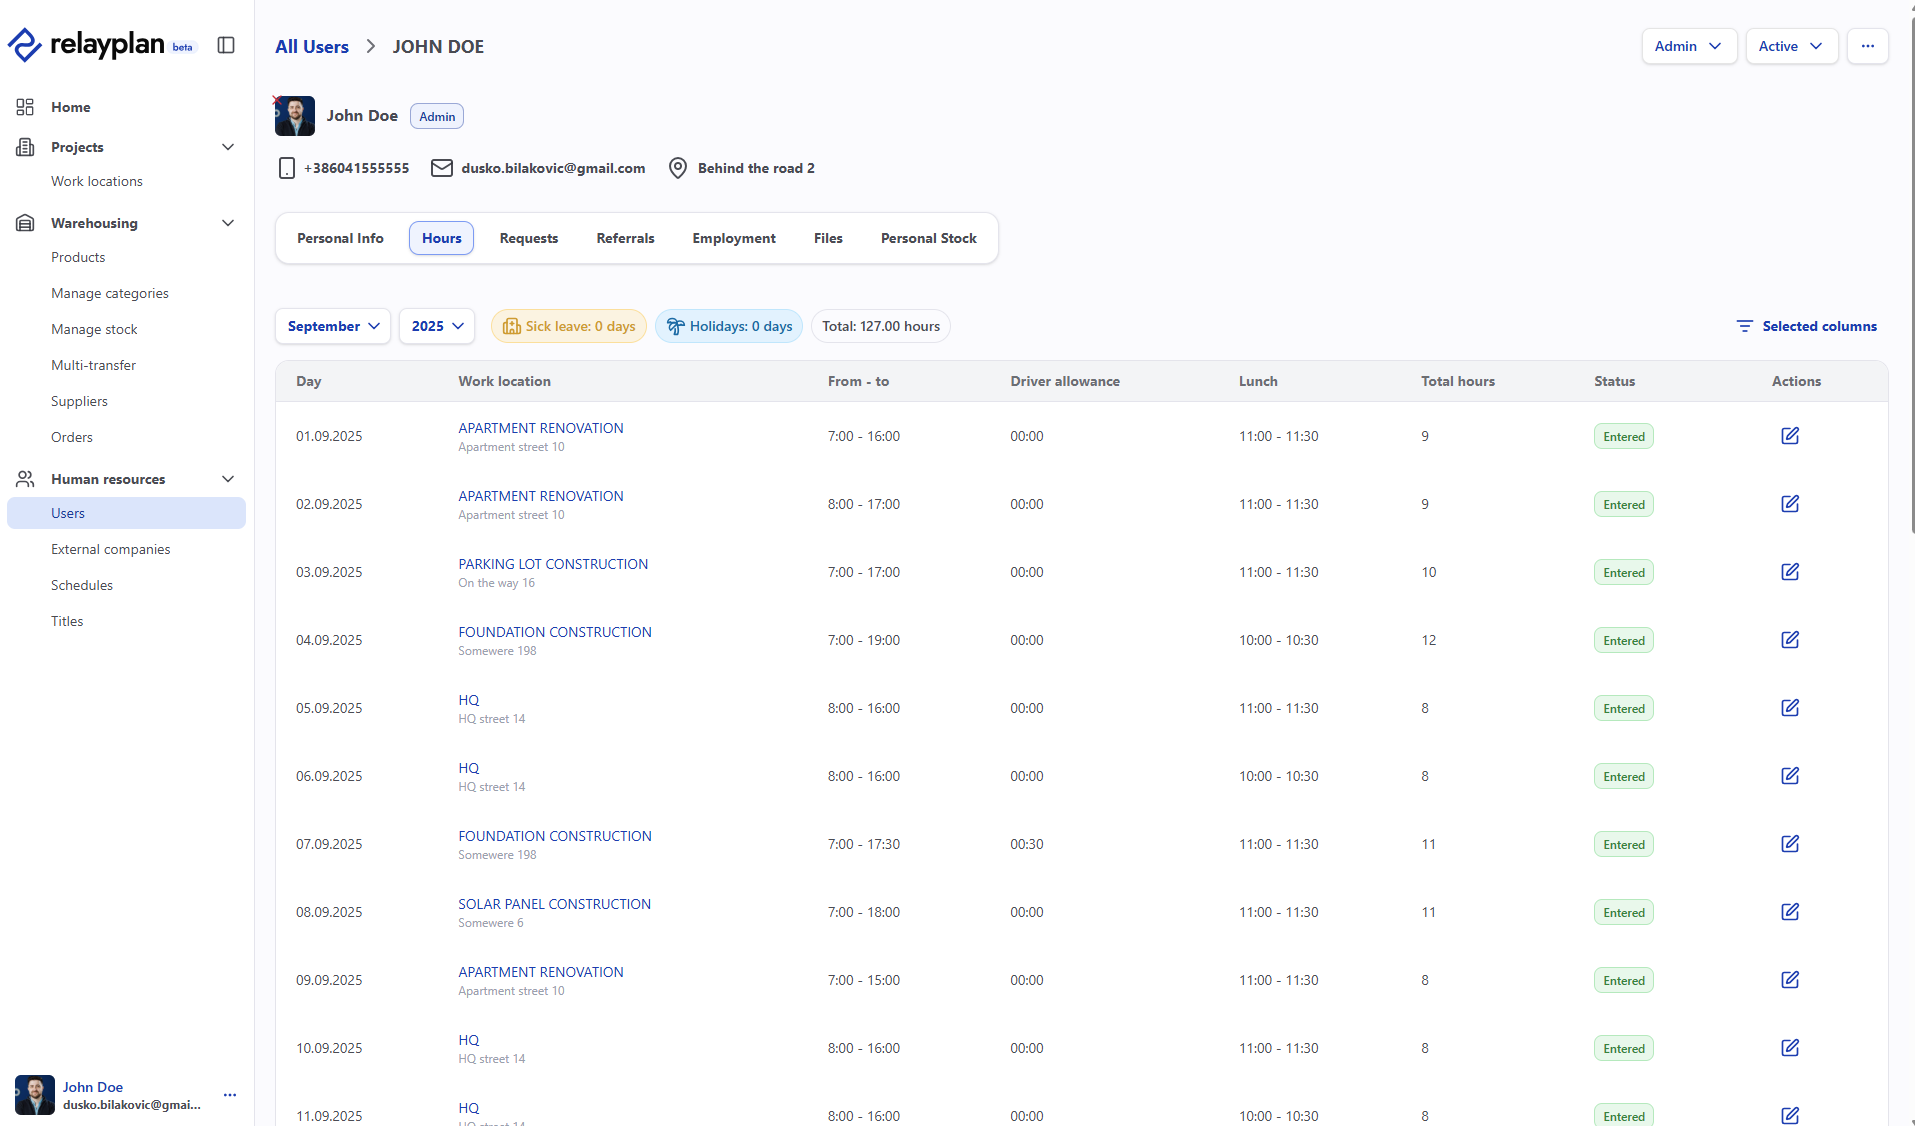 Hours overview
Entry methods
- Manual entry by an administrator or HR-responsible person – via the web app (day, cost center, description).
- Mobile app – employees register hours via the app (see Mobile app).
Approving hours
- Open HR → Users and select a user.
- On the “hours” tab you can see recorded hours and adjust them, as well as sick leave and vacations.
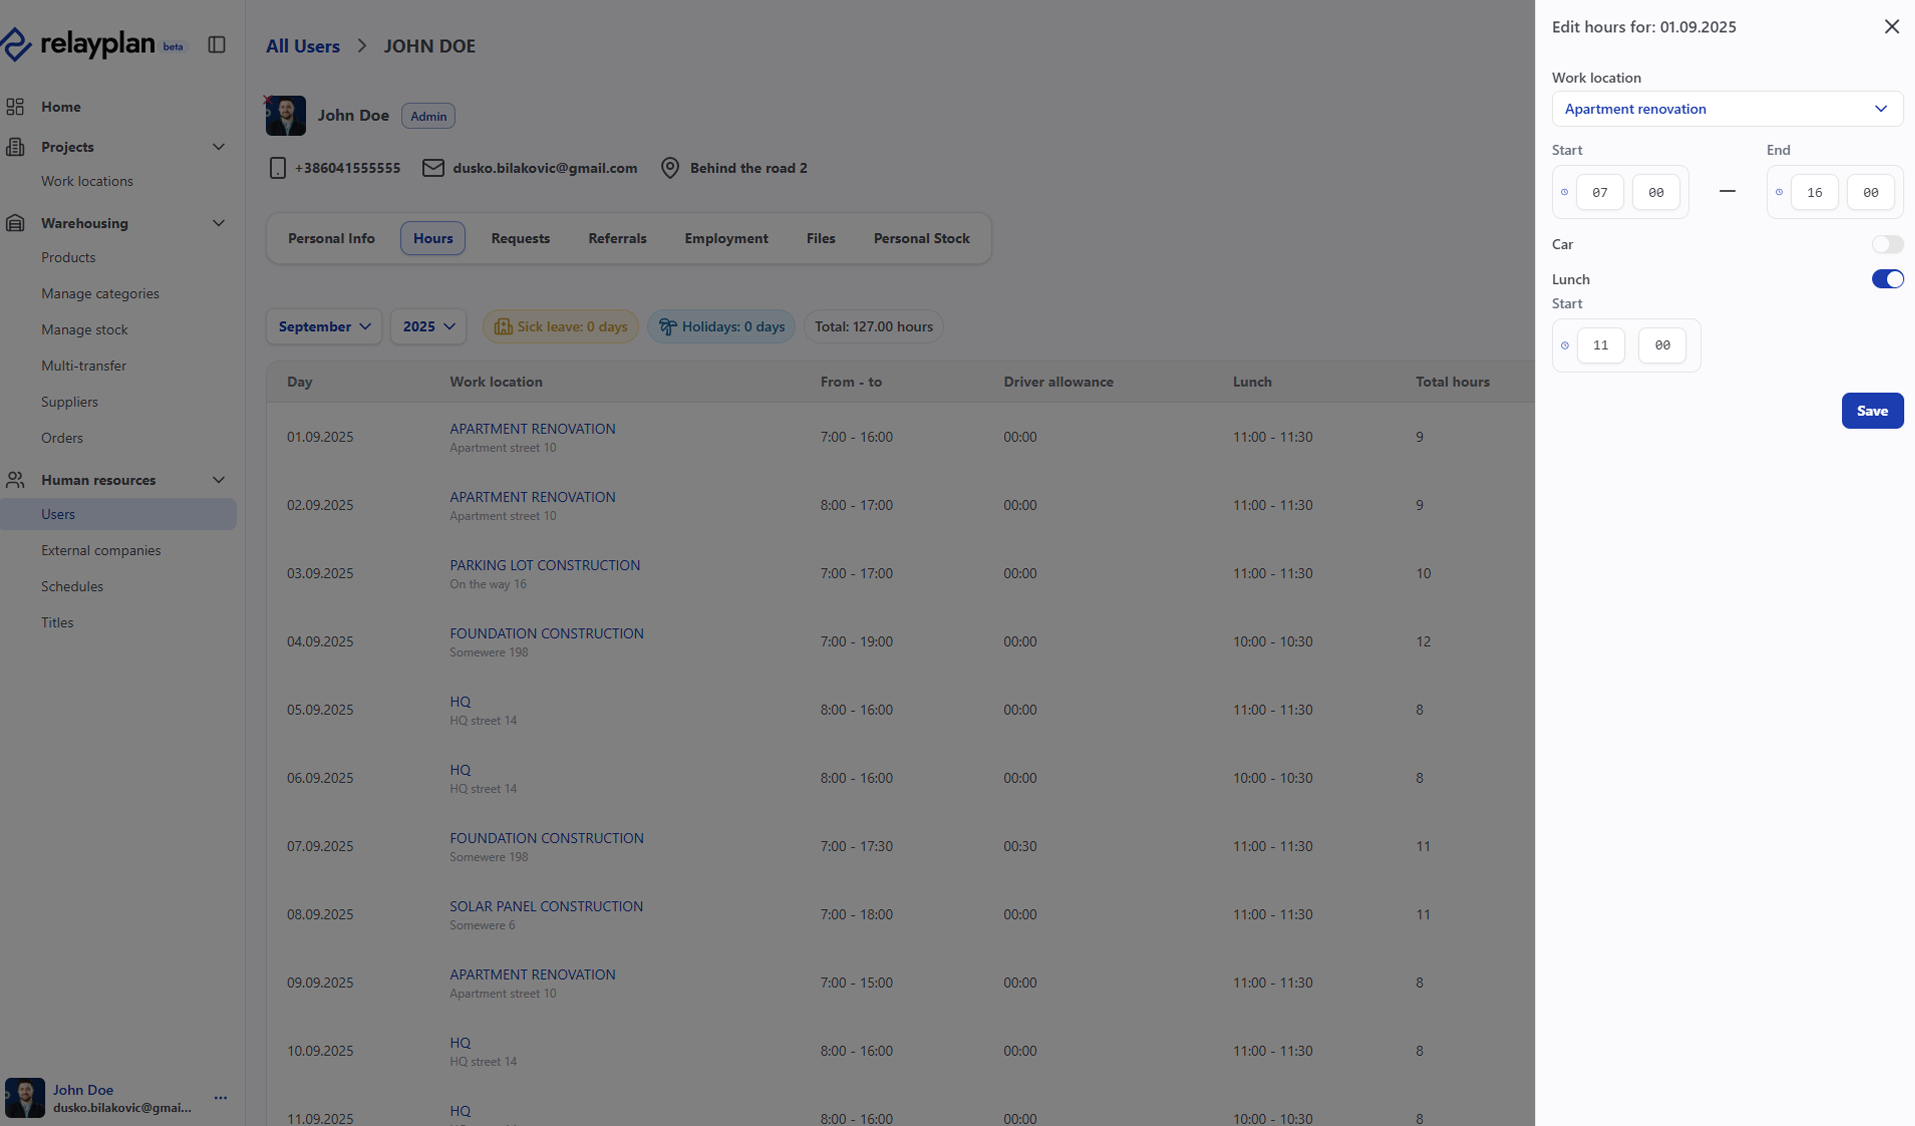 Edit hours
Warehouse
Efficient warehouse management is essential for every construction, installation, or service company. The warehouse module in RelayPlan gives you a complete overview of all material movements—from the central warehouse to personal stock and project locations. Every item or material is traceable, preventing losses, wrong transfers, or misuse. With modern digital tracking, you reduce paperwork, save time, and have data at hand anywhere, including in the field or from home/abroad.
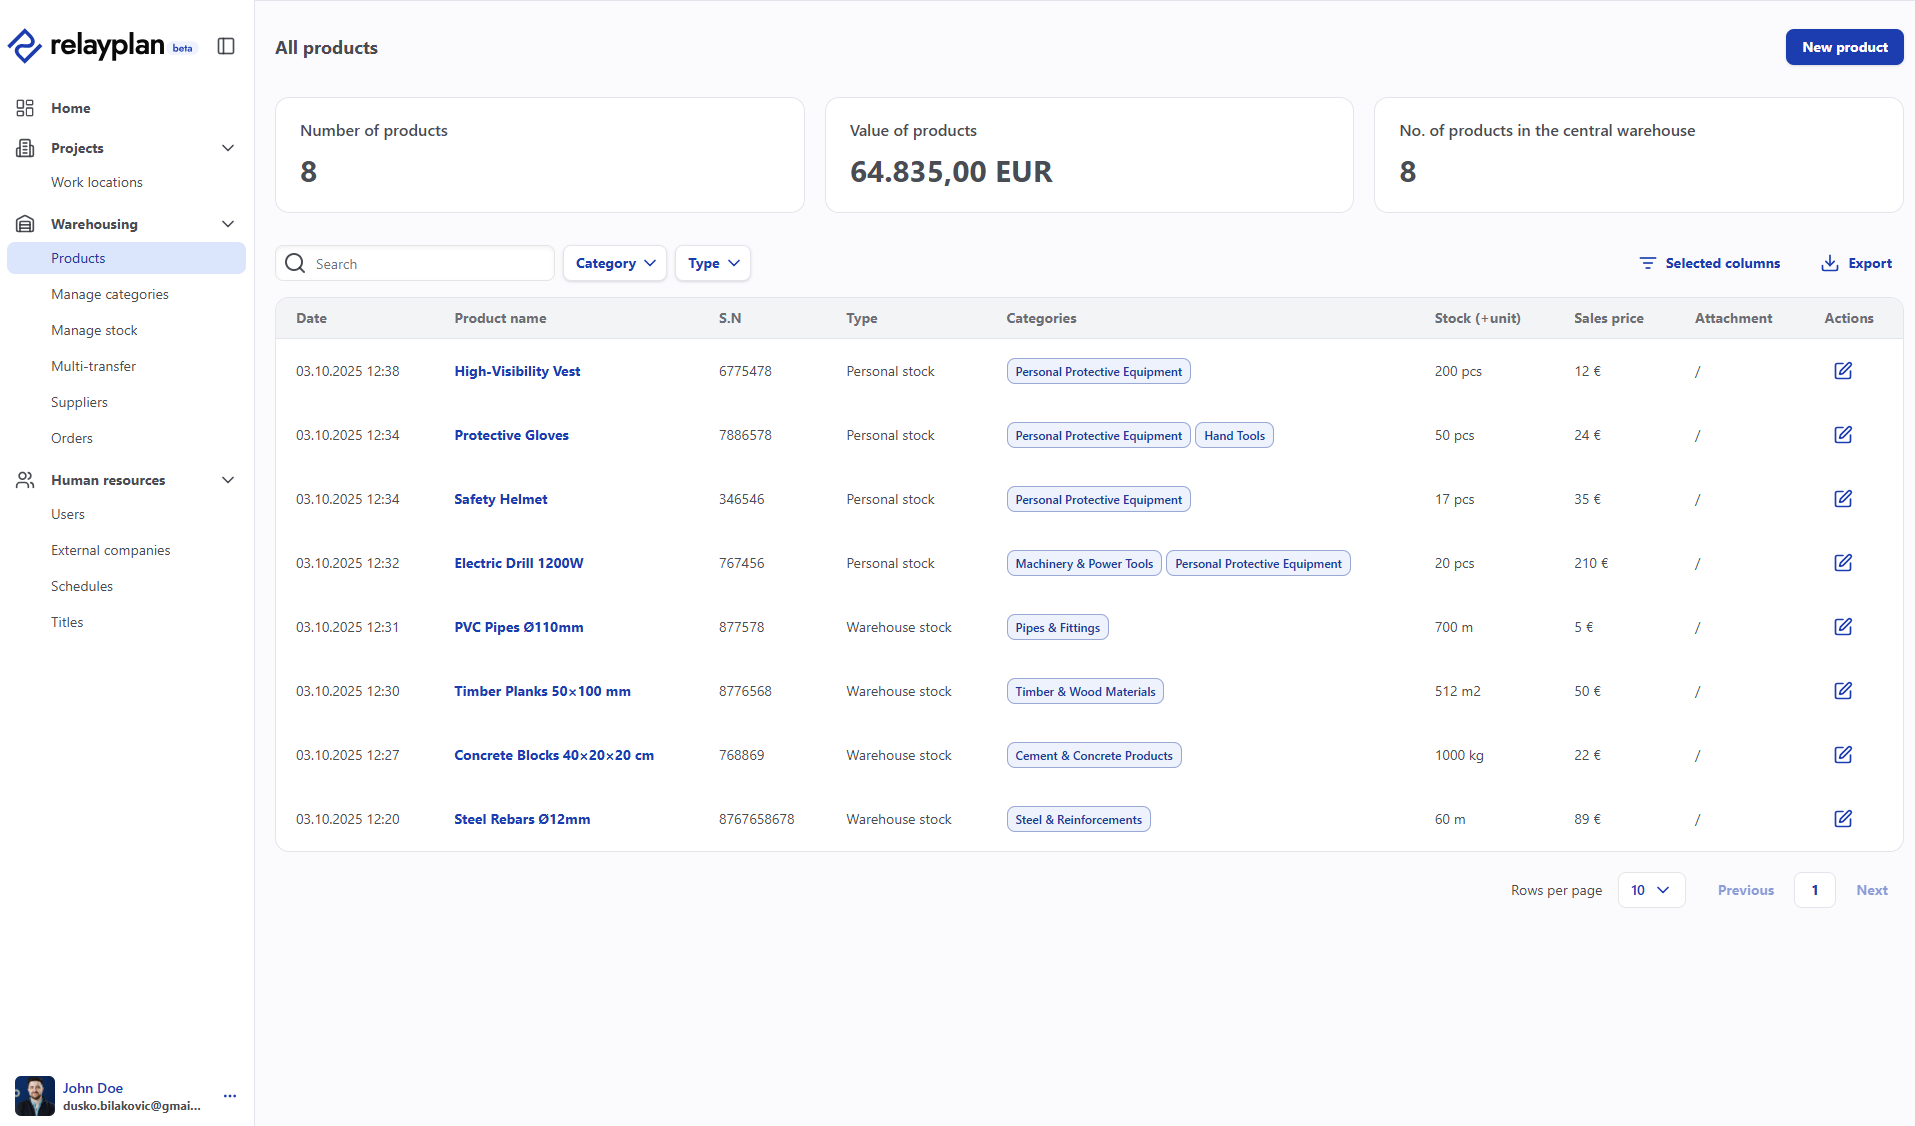 Warehouse items list
Quick start
- Create categories (e.g., Connectors, Cables, Tools).
- Add items with unit of measure, SKU, and minimum stock.
- Enter initial stock or post it via Orders.
- Use Multi-transfer for bulk transfers.
Stock movements and editing items/material and personal equipment
- Transfer – move between warehouses or to a cost center.
- Return – from the site back to the warehouse.
- Partial write-off – when material is consumed gradually.
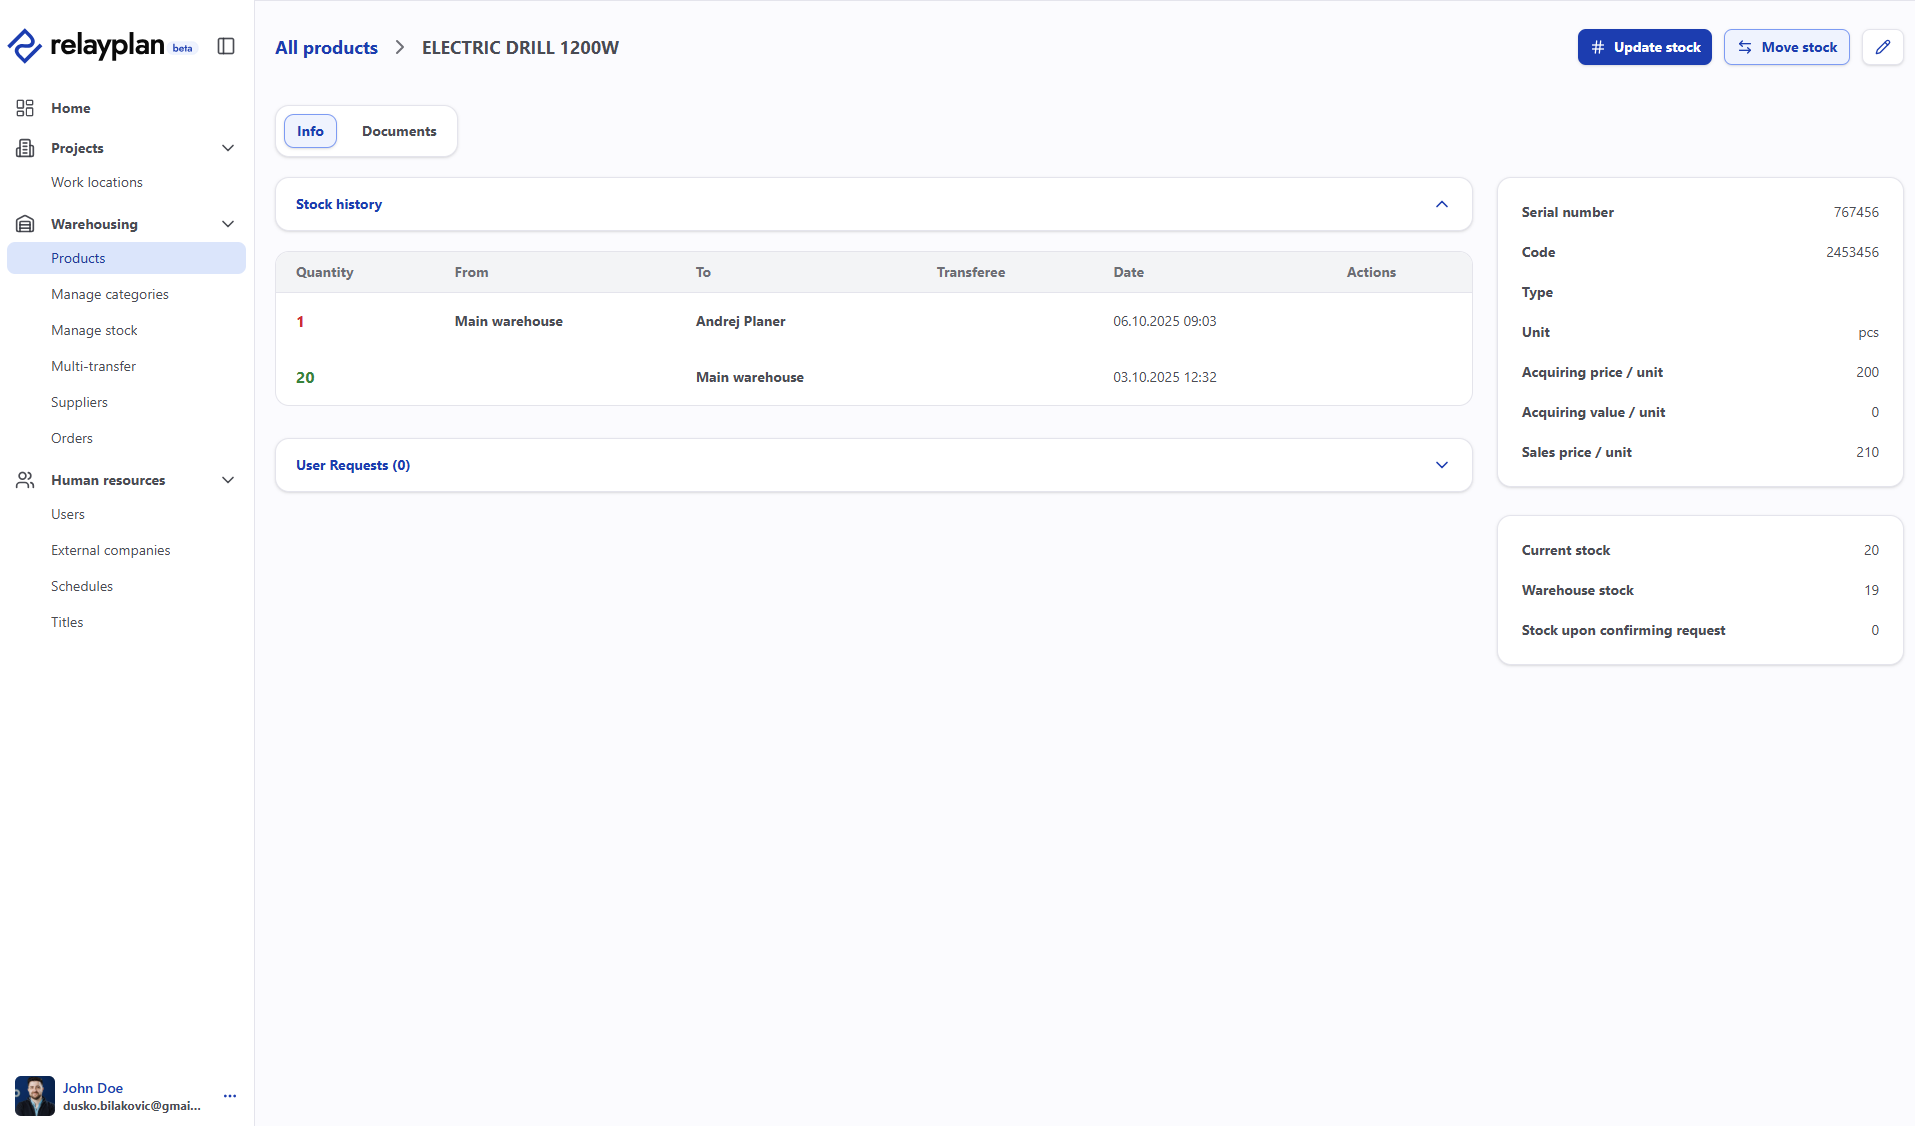 Edit & view item
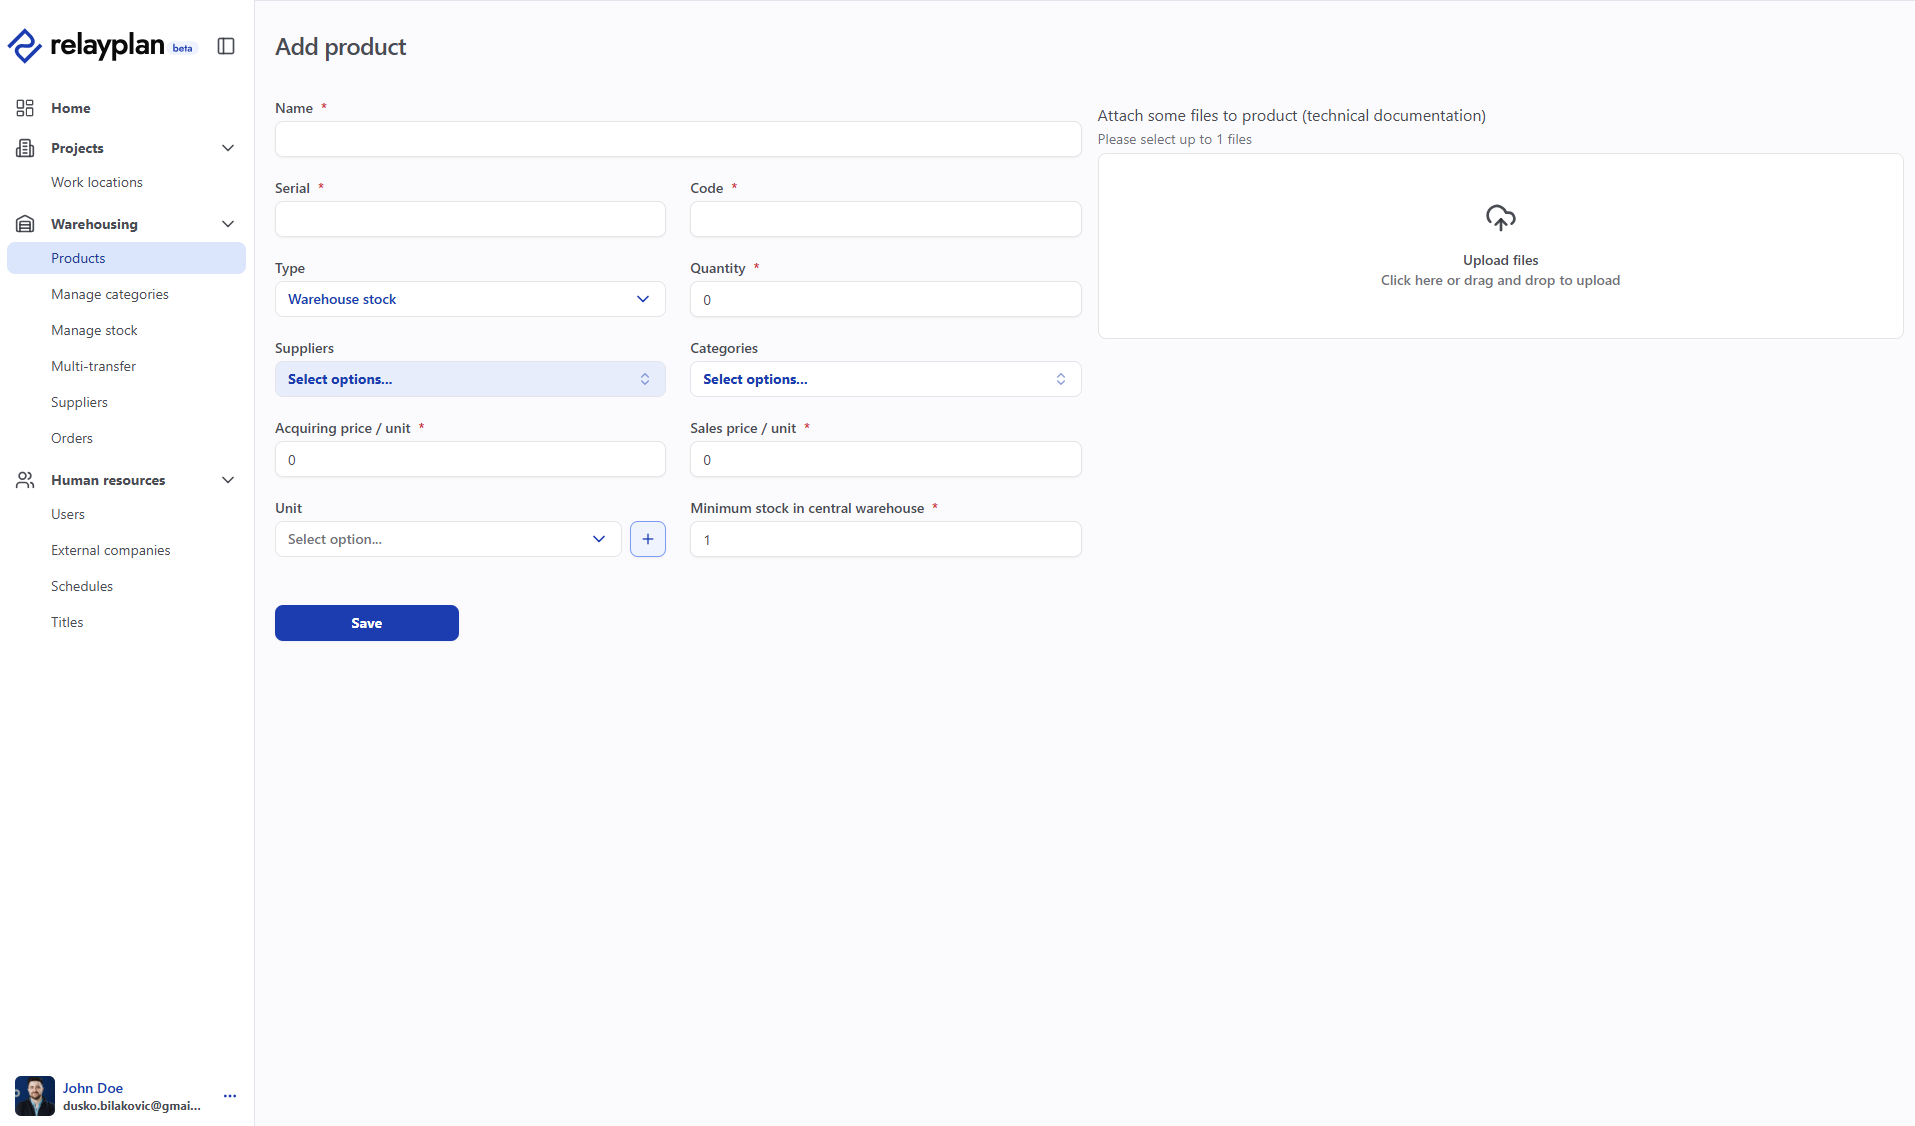 Add new item
Orders
The Orders module leads the entire purchasing process—from identified need, preparation and approval of a purchase order, to receipt and posting stock to the warehouse. With an automatic link to stock levels, the system suggests orders when it detects shortages, helping you avoid project delays and duplicate orders. The process is fully digital and auditable, with export options for accounting or suppliers.
Guide the purchasing flow: order → purchase order → receipt → stock posting.
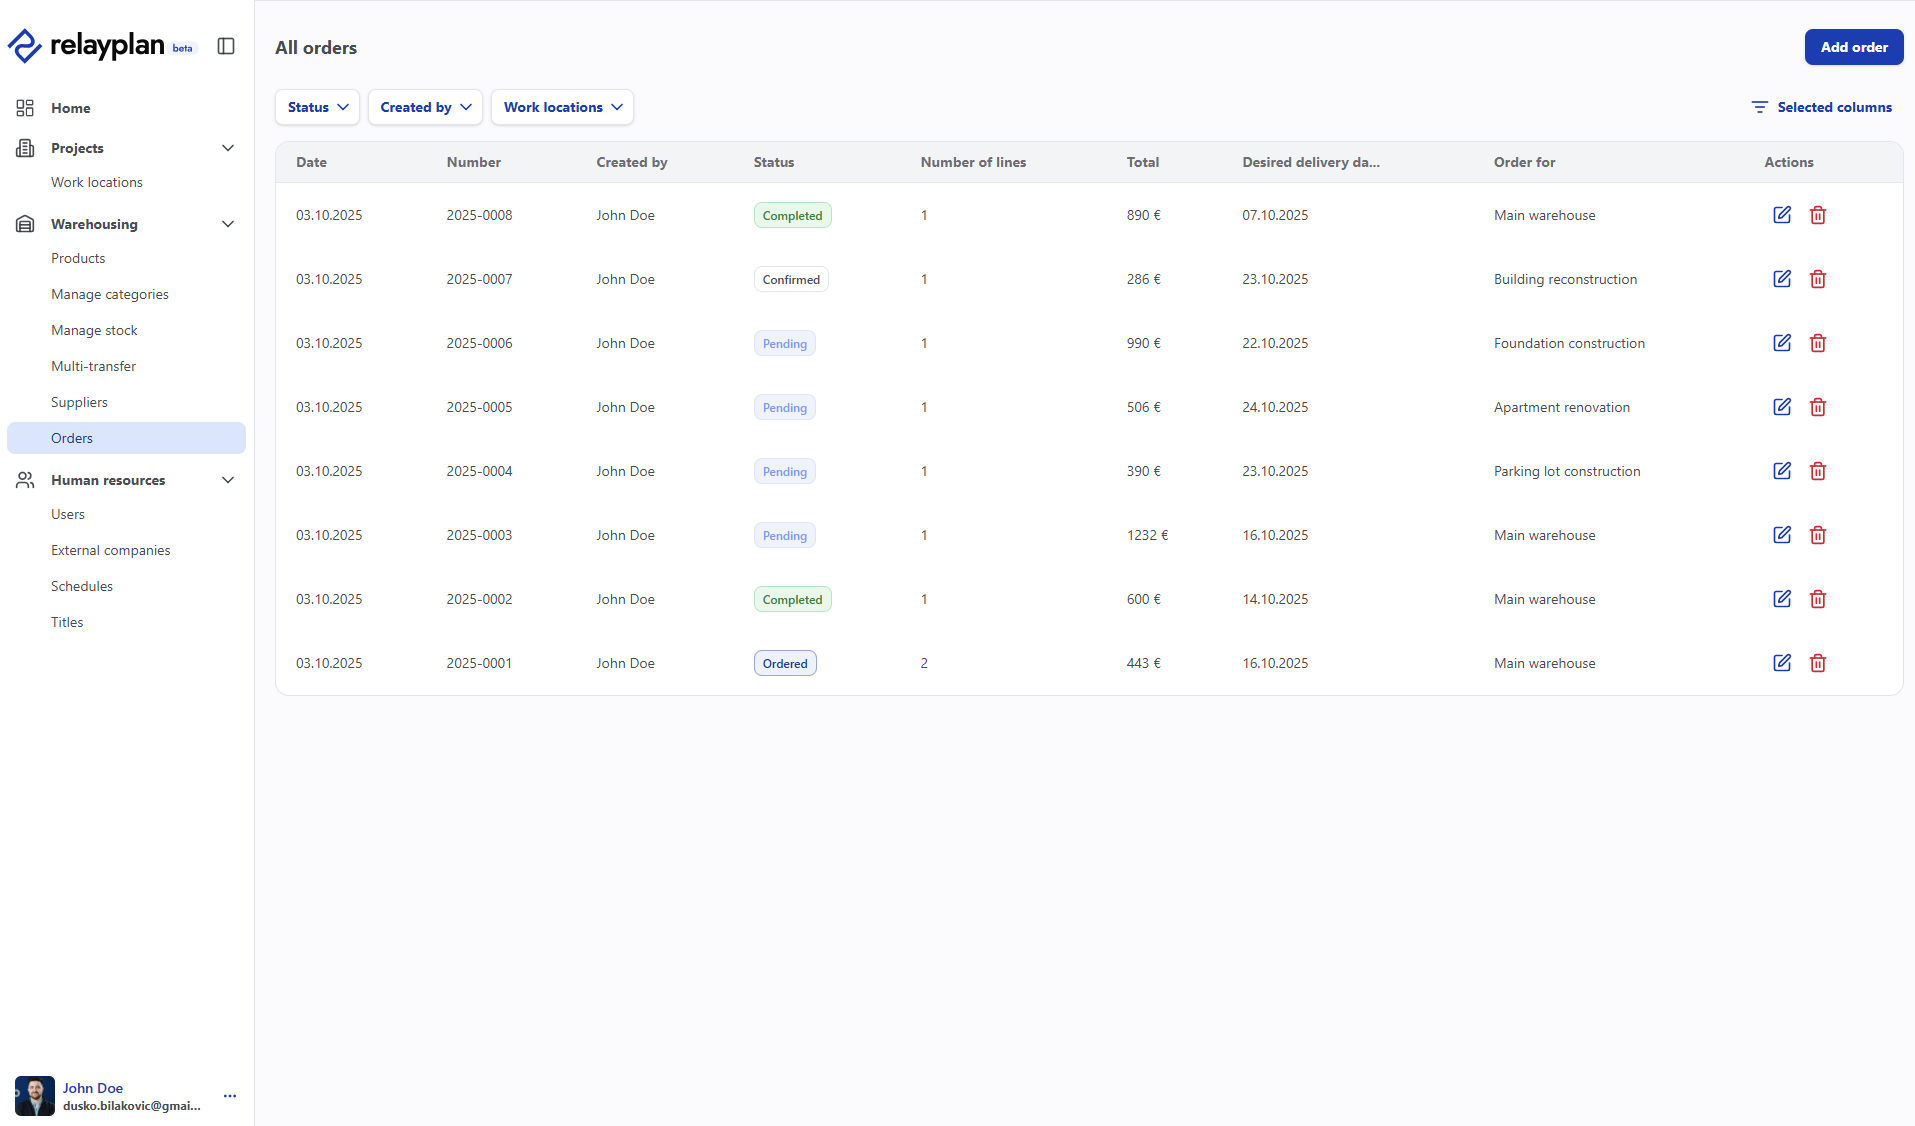 Orders list
Workflow
- Create an order (supplier, items, cost center).
- Send or export the purchase order (if needed).
- When items arrive, record the receipt and post stock.
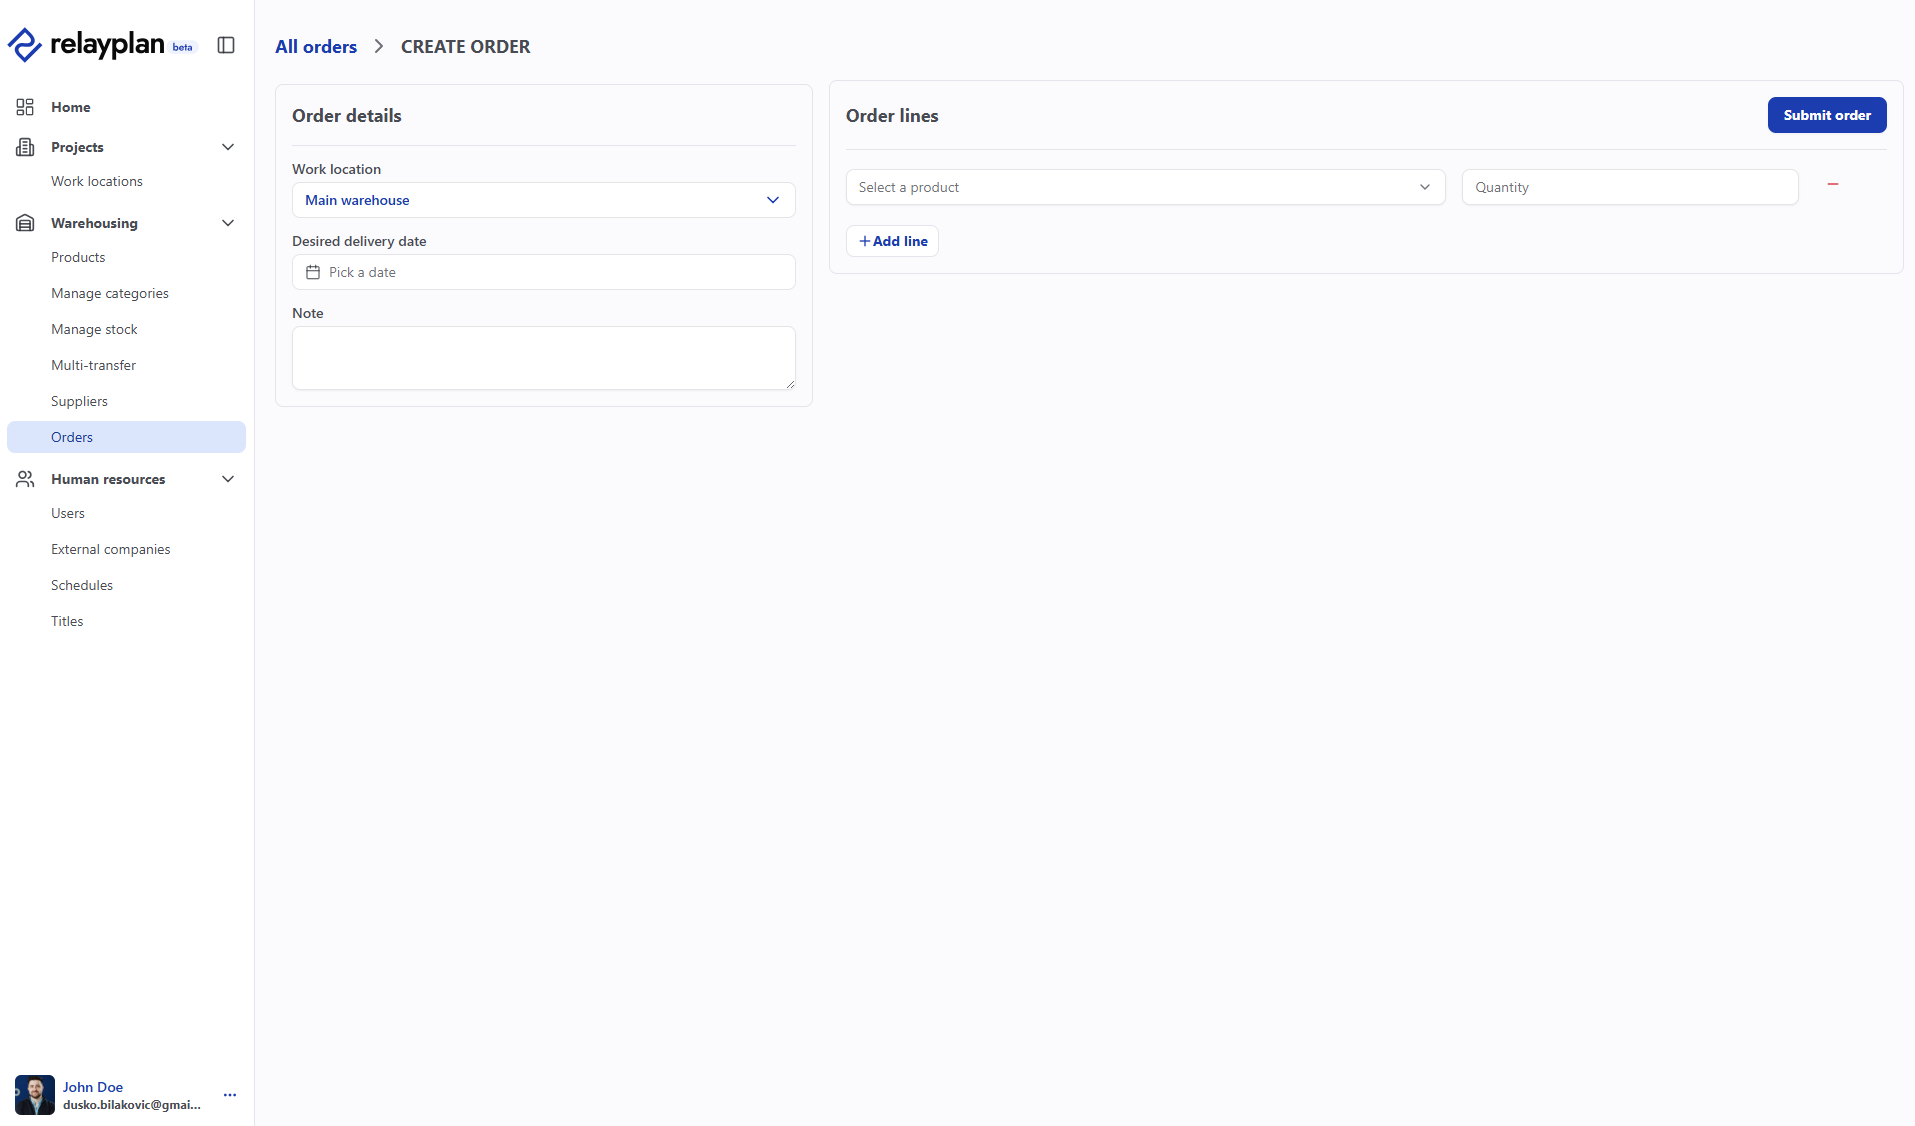 Create order
 Edit order
Invoices (received & issued) Soon
The Orders module leads the entire purchasing process—from identified need, preparation and approval of a purchase order, to receipt and posting stock to the warehouse. With automatic links to stock levels, the system suggests orders when shortages are detected. This helps you avoid project delays and duplicate orders. The process is fully digital and traceable, with export options for accounting or suppliers.
Received invoices
- Invoices → Received → Add.
- Select supplier, enter amount, due date, and attach PDF.
- Link to a cost center.
Issued invoices
- Invoices → Issued → New invoice.
- Add items (products/services) and link to a cost center.
- Save and export if needed.
Employees & assignments/schedules
Modern field operations require precise and clear management of assignments—whether it’s work orders or temporary placement of workers to another location. The assignments module makes planning and tracking all types of assignments easy, giving you more operational efficiency and control over execution. Assignments are linked to employees, projects, locations, hours, and resources. Built-in digital messaging reduces paper, phone calls, and errors, increasing traceability and reliability.
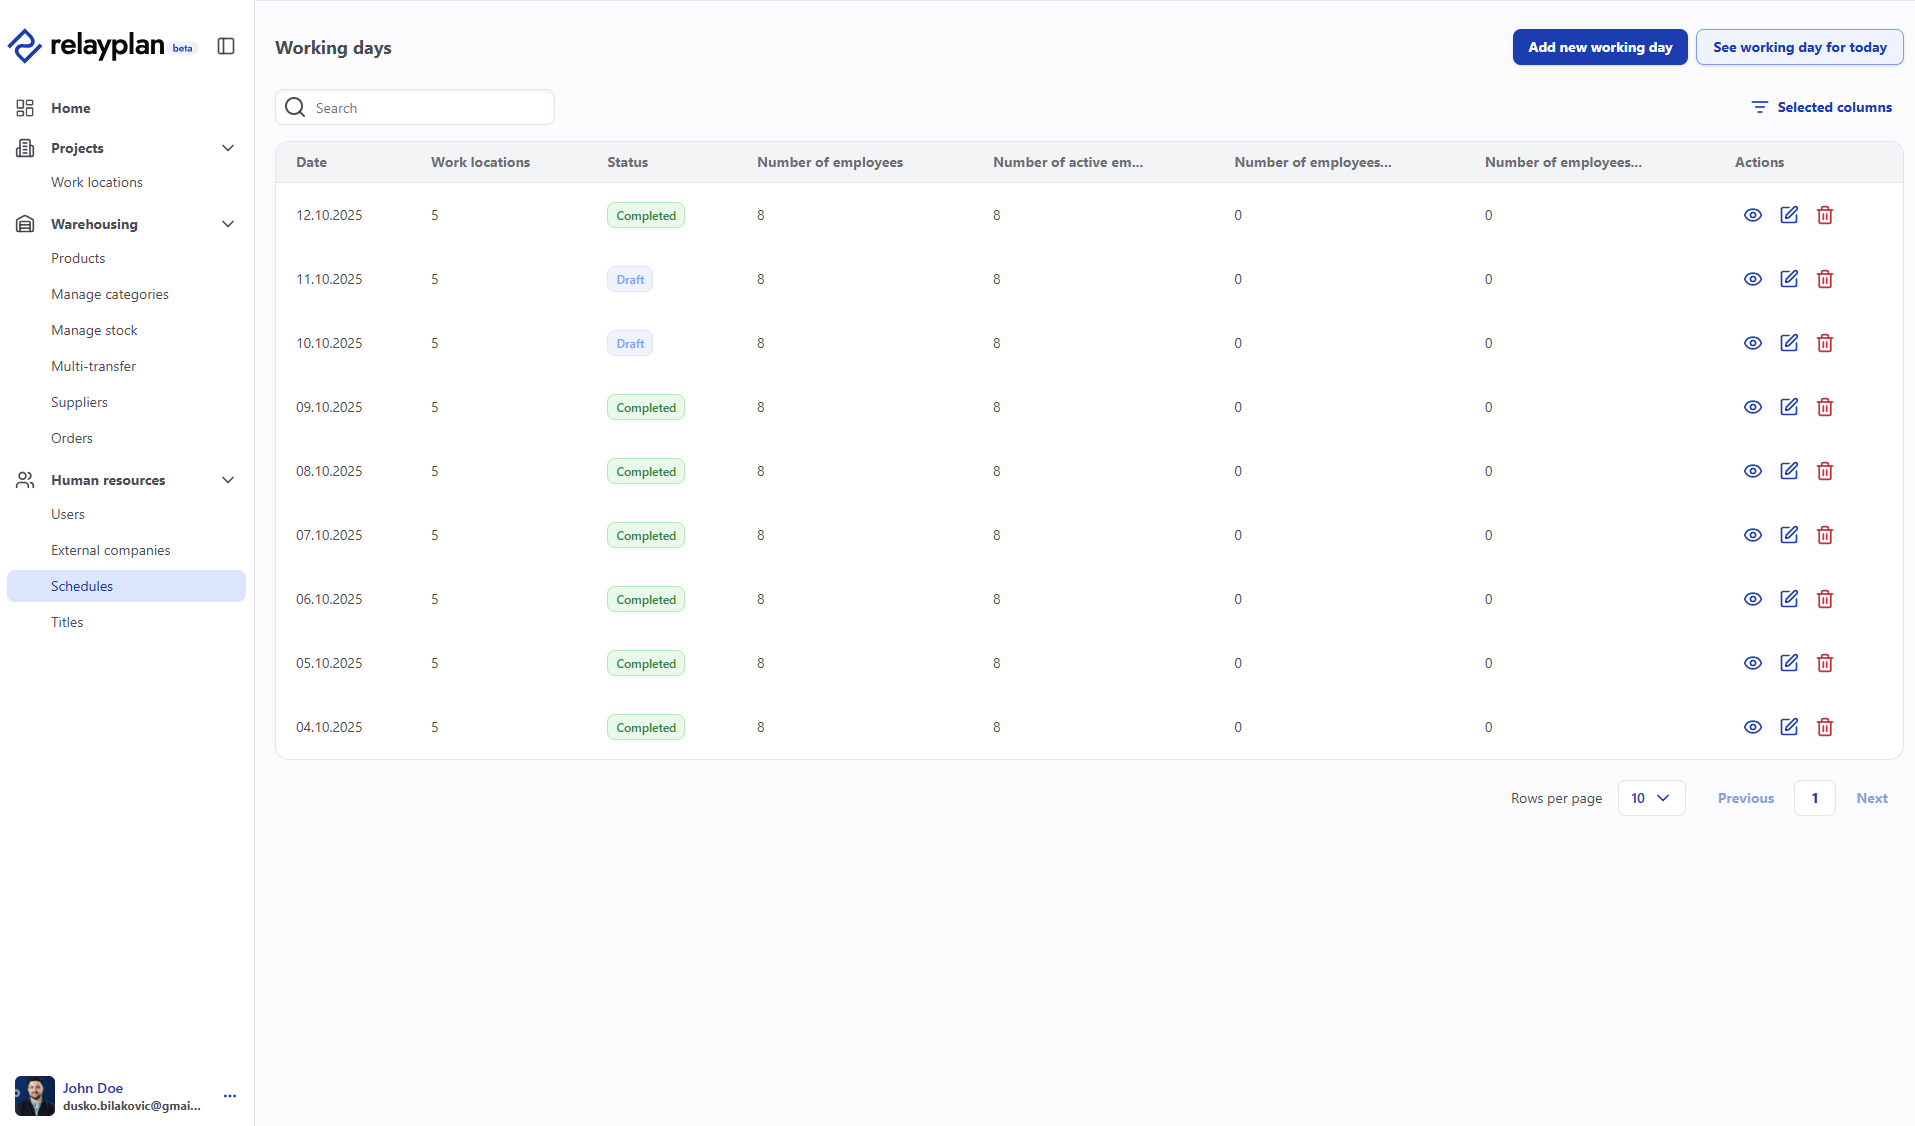 Assignments / schedules list
Add an employee
- Employees → Add user.
- Enter basic details and attach documents if needed (medical, H&S, certificates). See Users & roles.
- Save.
Assignments to cost centers
- In HR – Schedules → Add assignment / new schedule/workday.
- Select the workday and cost center.
- Save and continue.
- Add employees.
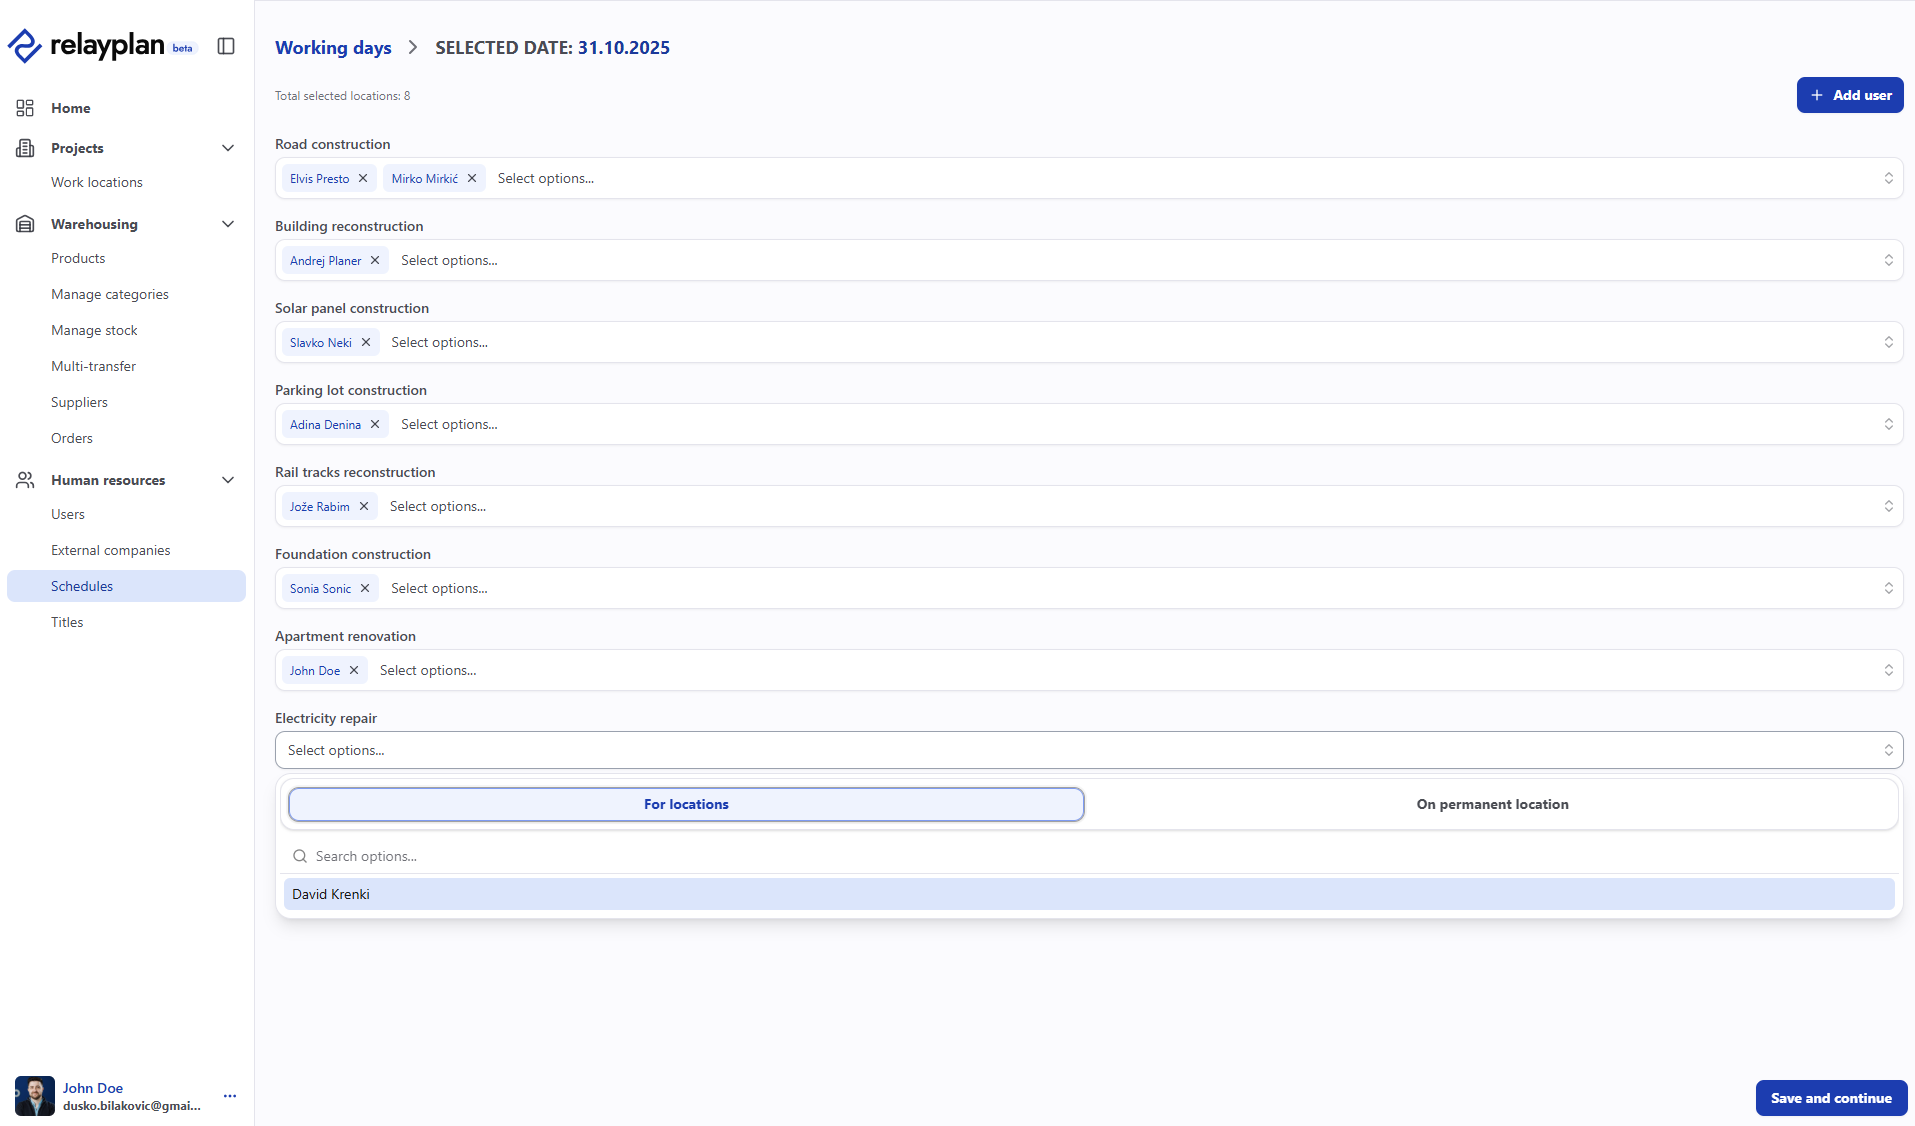 Edit assignments / schedules
Vehicles Soon
Efficient warehouse management is essential for every construction, installation, or service company. The warehouse module in RelayPlan gives you a complete overview of all material movements, and vehicles link with costs and usage.
Fleet capabilities
Review vehicles with basic info (make, plate, type, registration date). View usage history and assign a vehicle to an employee for a period. The system reminds you of upcoming technical inspections or registration. Enter service/insurance costs and track annual costs per vehicle. For larger costs, the system suggests replacement or further feasibility checks.
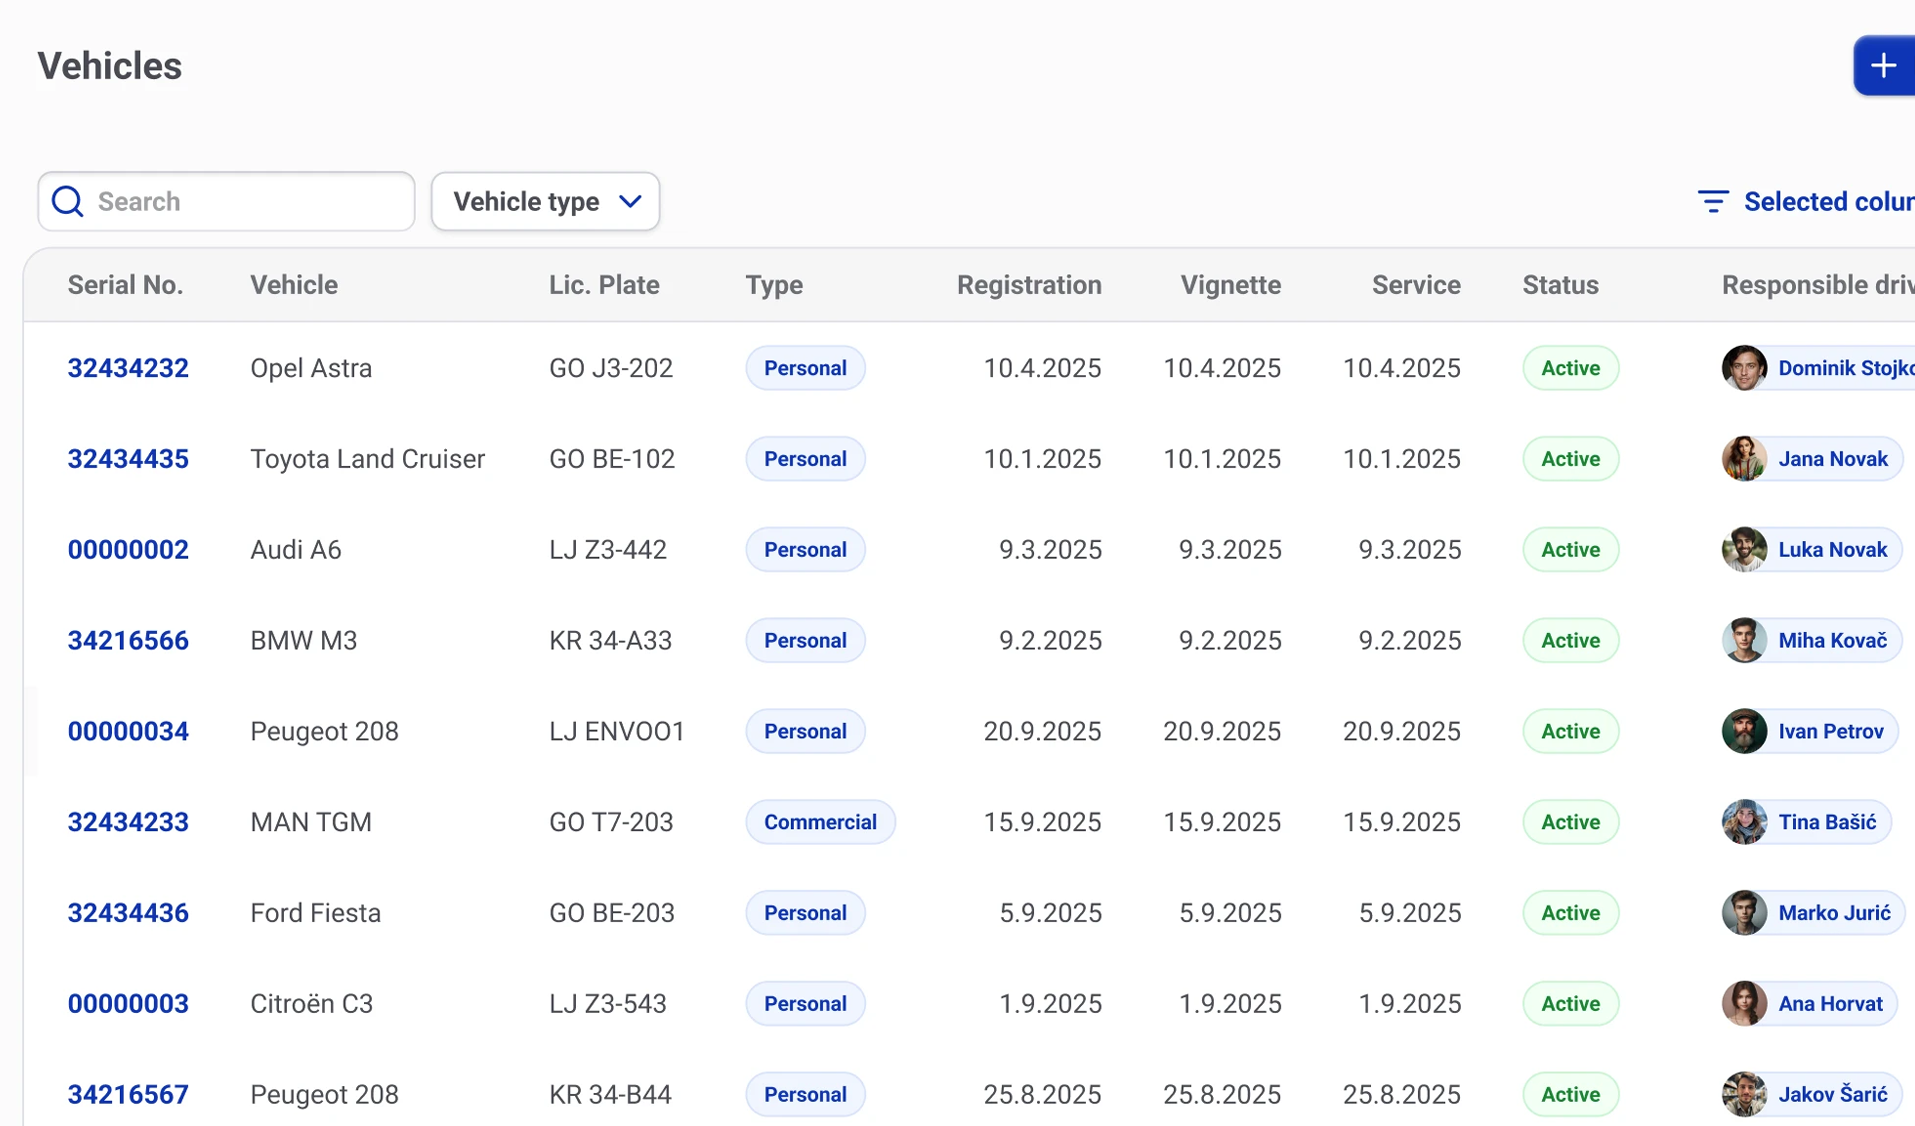
Add a vehicle
- Vehicles → Add.
- Enter details: plate, make/model, year, km.
- Add dates (registration, inspection, vignette) and reminders.
- Assign a driver if needed.
Services & costs
- Record services (date, type, amount, invoice attachment).
- Track fueling (date, quantity, price, location).
Stock count, transfers & inventory
Accurate visibility of real stock status is crucial for smooth operations. The stock module supports precise lists across locations, including spare parts, small materials, and tools. The system records quantity, location, purchase/sale price, and serial numbers if needed. Inventory support helps you quickly detect discrepancies and keep stock accurate.
Stock management capabilities
Open stock lists for the main warehouse or a given personal stock. Review items below minimum stock. Print or export lists. During inventory, enter new quantities manually or import from a spreadsheet. View item movement history or filter by projects where the material was used. Manage personal stock visible to employees in the mobile app.
Add stock
- Stock management → Fill the form.
- Enter document, serial number.
- Select cost center or warehouse and the quantity.
- Add more rows if needed.
- Save.
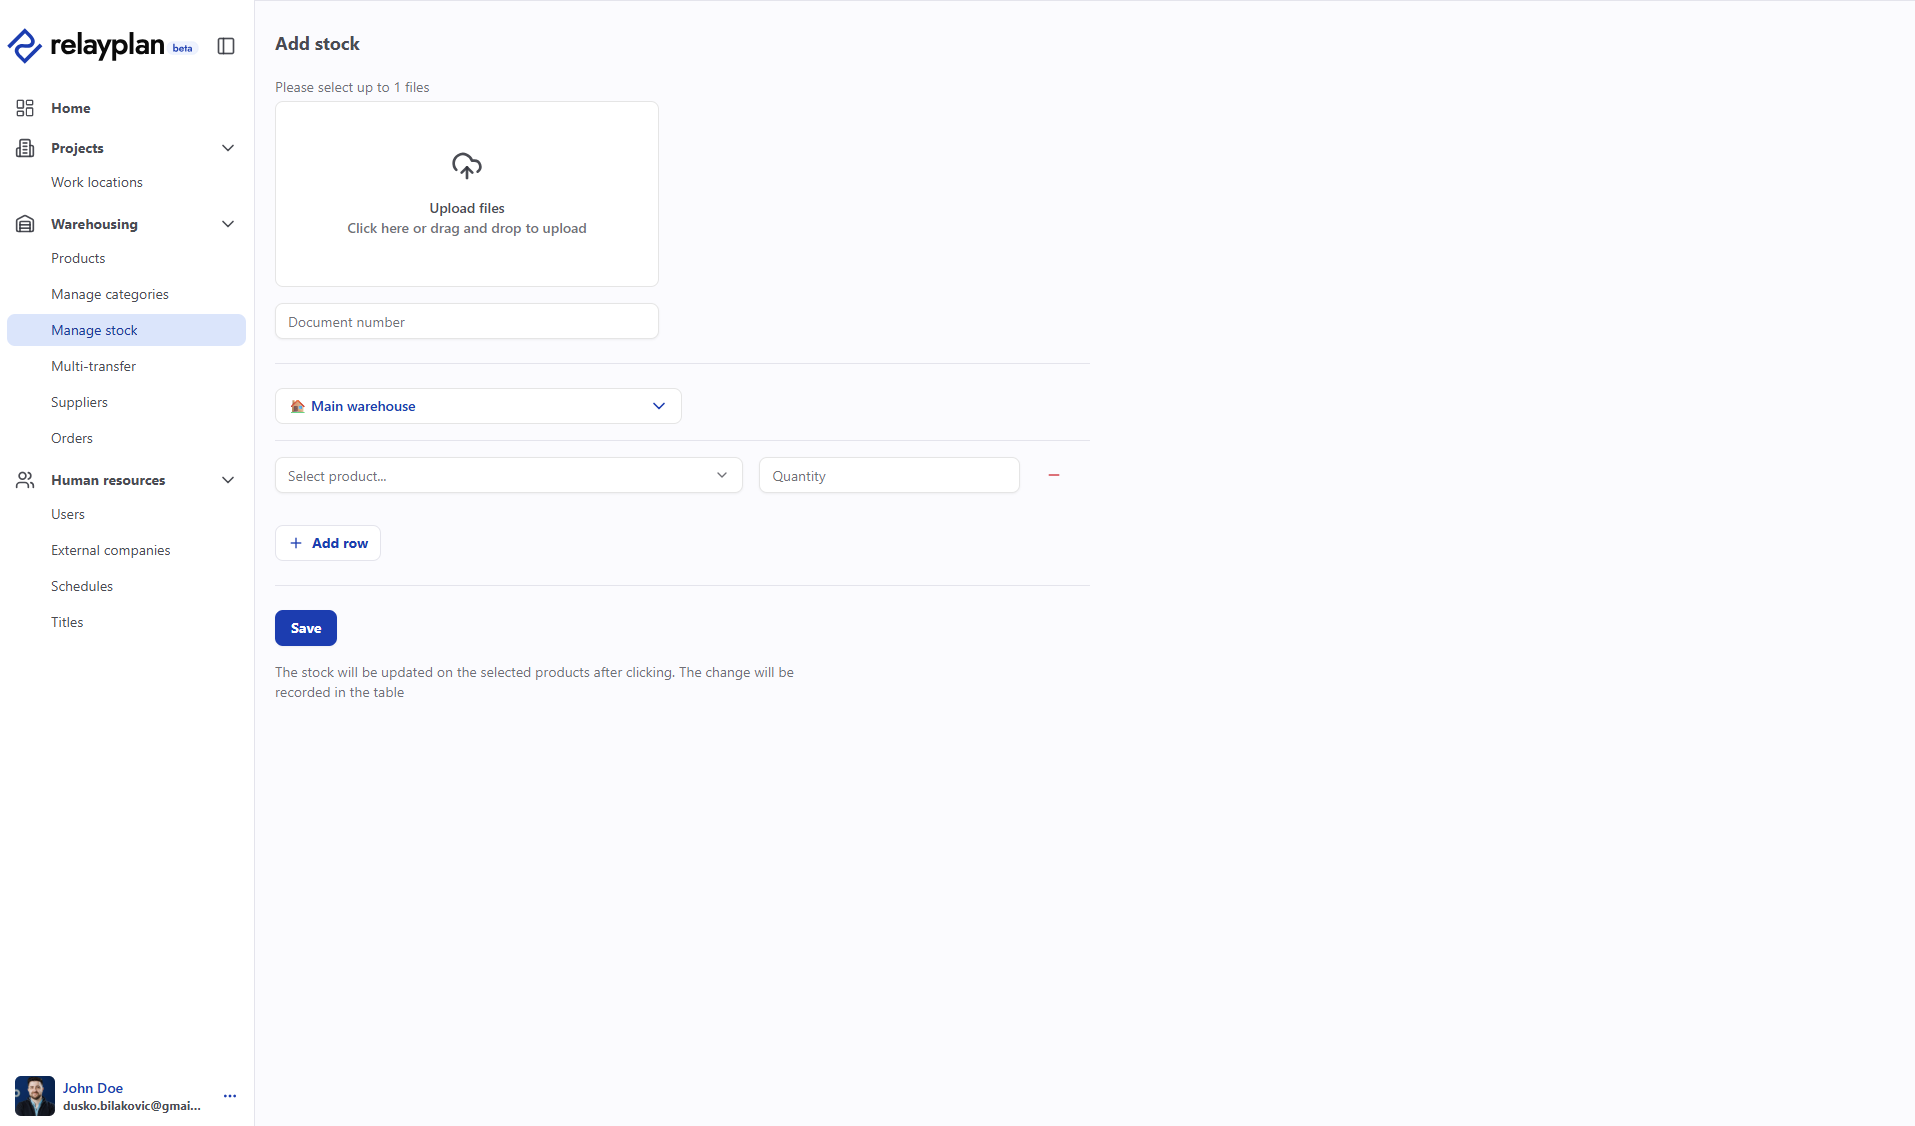 Edit/add stock
Transfer multiple items with Multi-transfer
- Multi-transfer → Fill the form.
- Select the cost center and recipient (who received material/personal stock).
- Select serial number/item and enter the quantity to transfer.
- Add more rows if needed.
- Save.
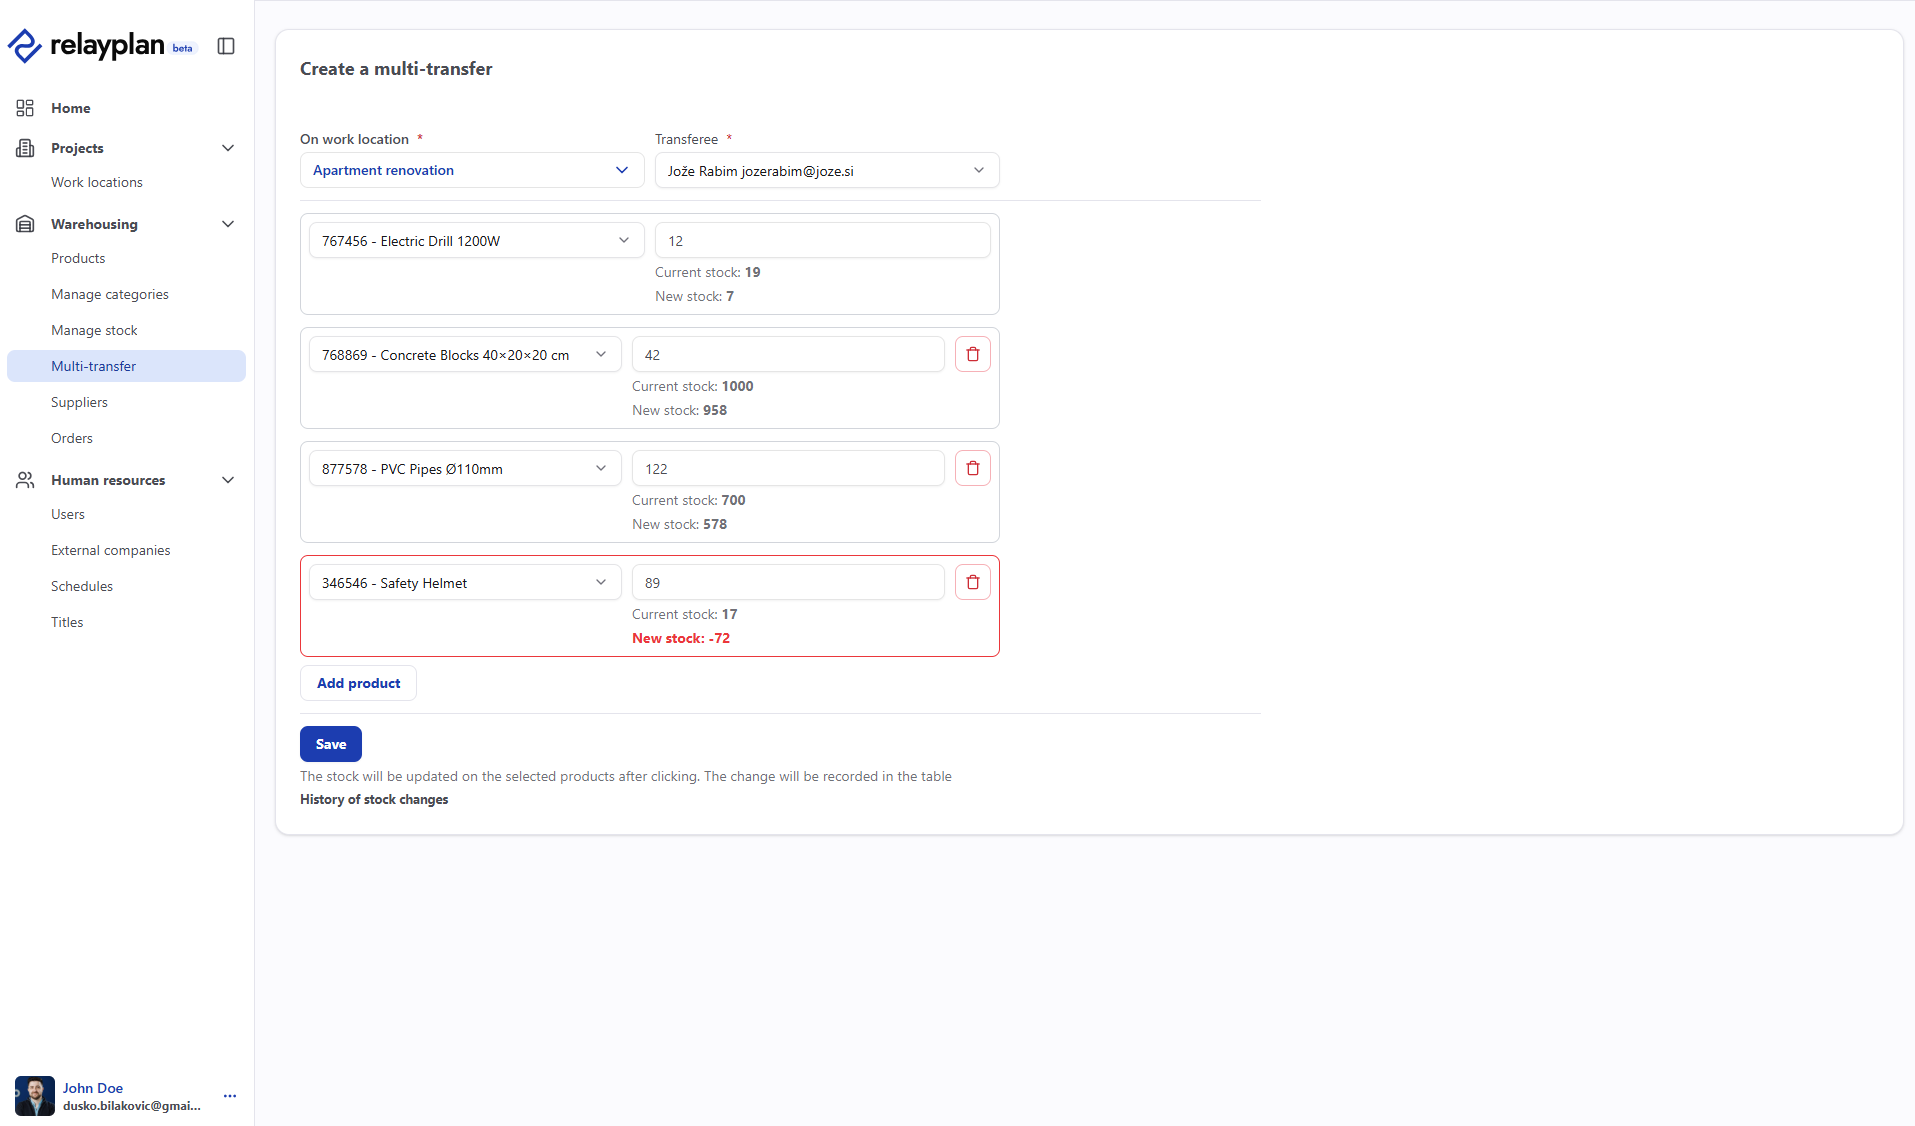 Multi-transfer
Detailed reports & analytics Soon
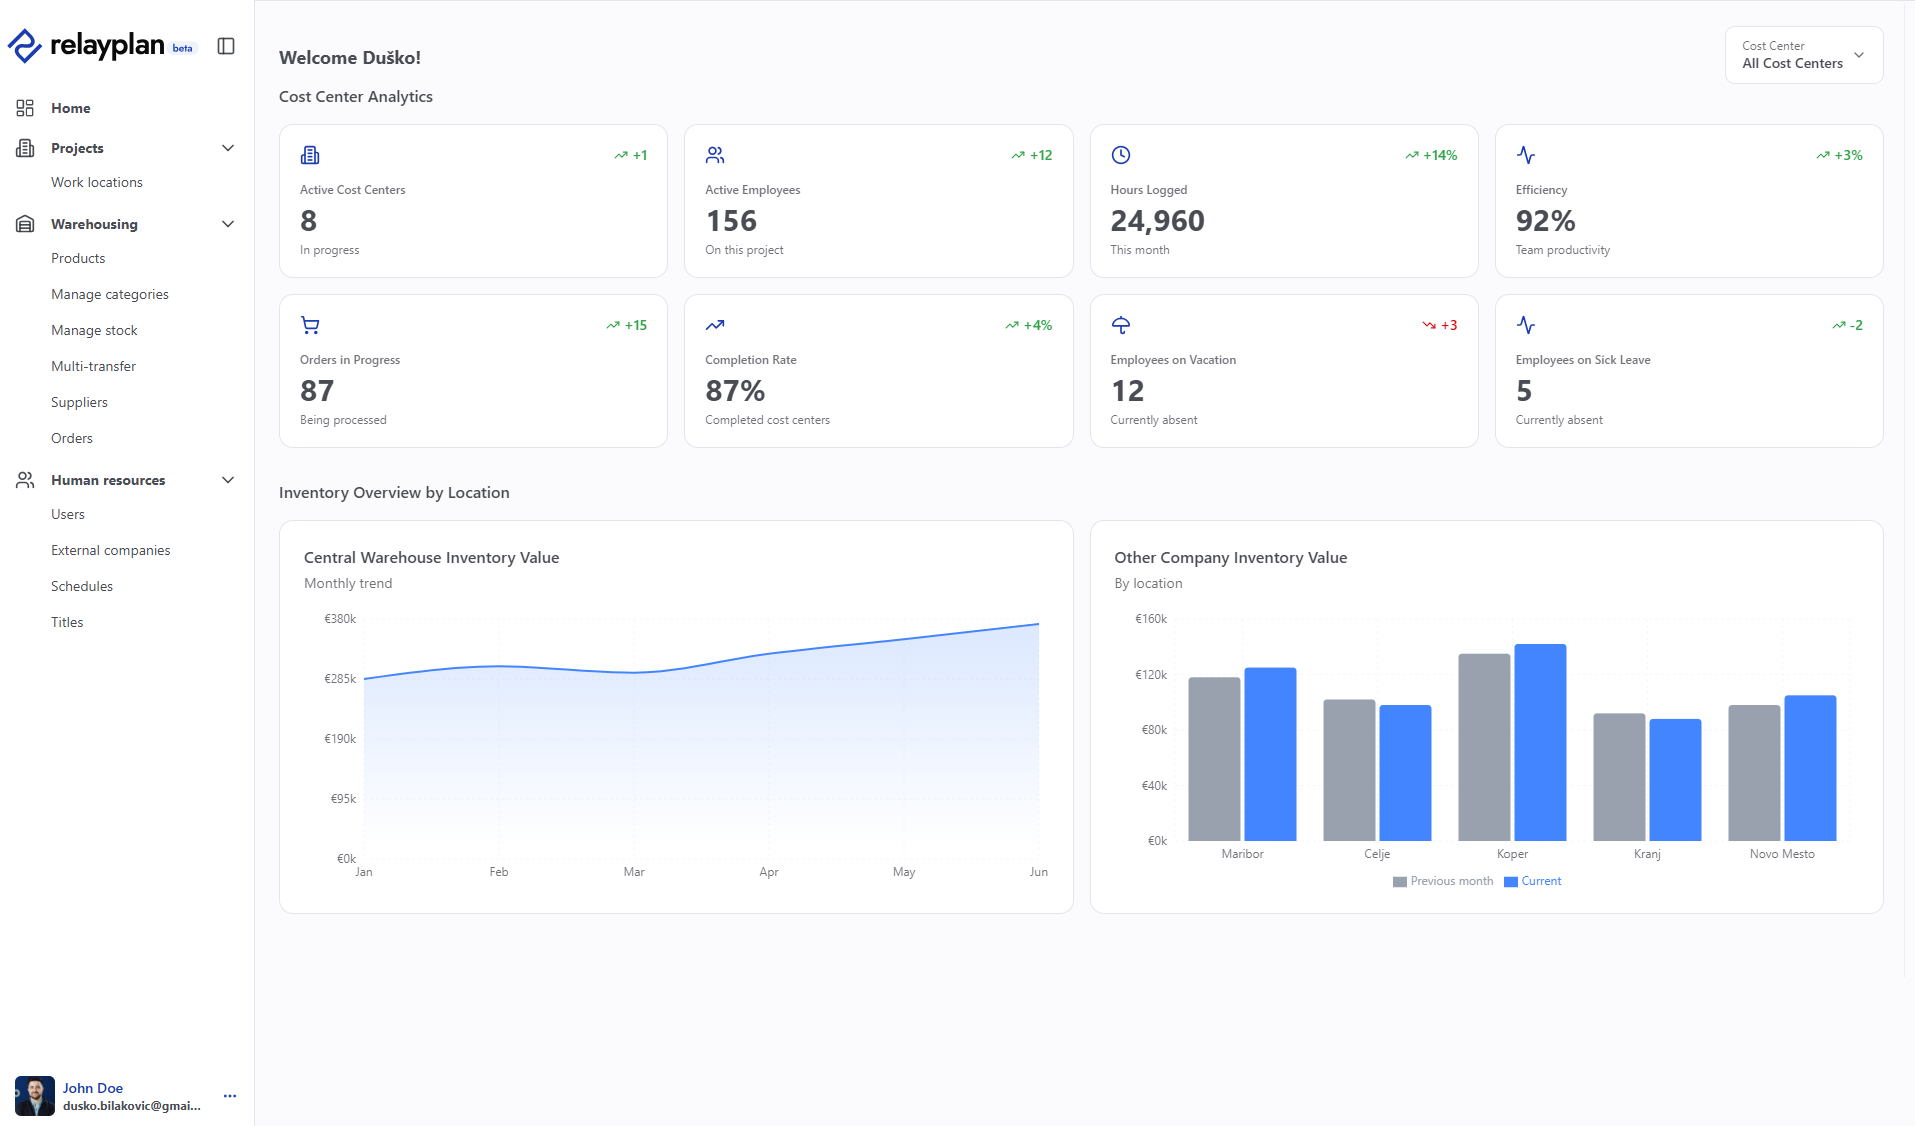 Analytics
Key reports
- Hours by cost center – quantity, cost, plan comparison.
- Material consumption – by cost centers and stock.
- Profitability – revenue vs. costs per cost center.
Export
- Select a report and set filters (date, cost center, responsible person).
- Click Export and choose CSV or Excel.
System settings
Set basic company data, languages available to your users and employees, add your logo, and choose your UI language.
- Language – choose your preferred language
- Company details – name, address, tax ID…
- Branding – set your logo
- Available languages – choose which languages will be available to users/employees.
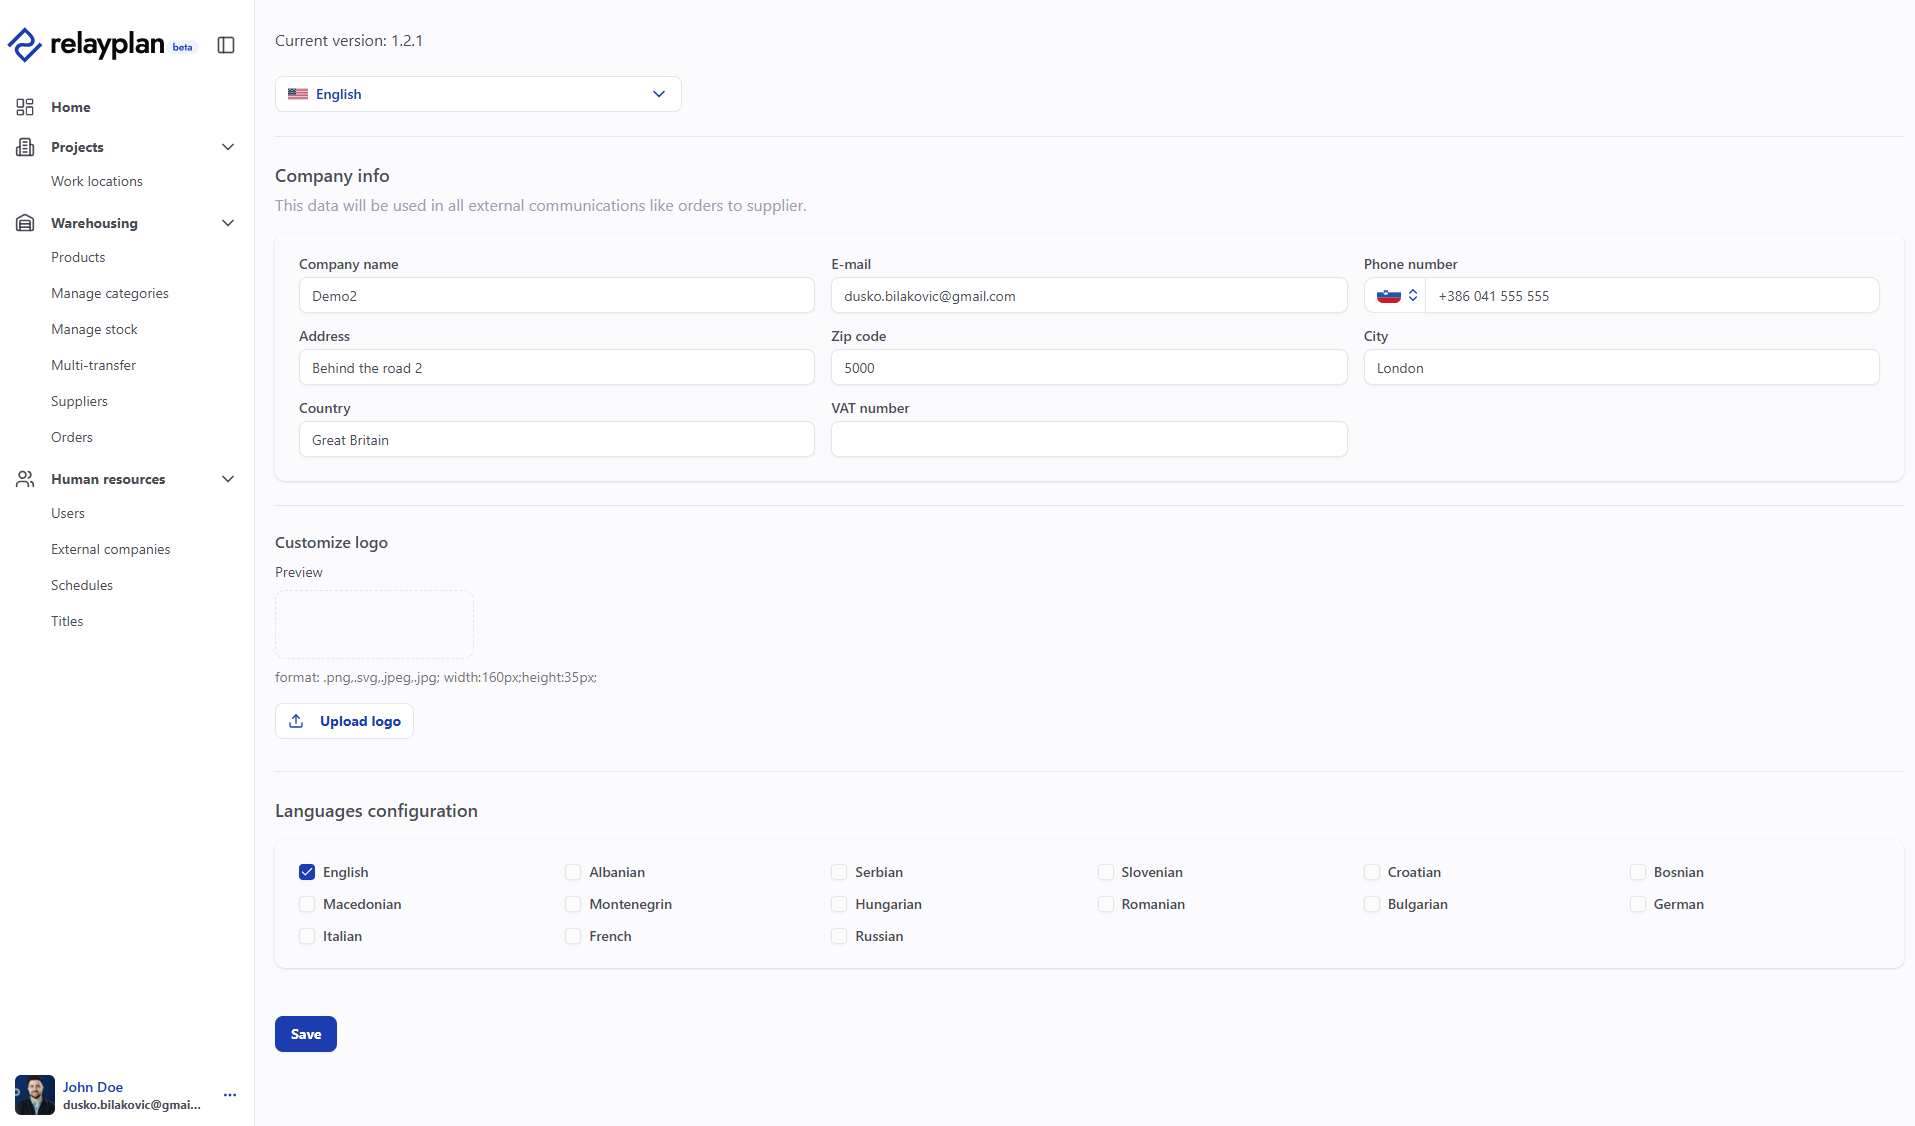 Basic settings
Mobile app
Tracking hours can be simple, automated, and paperless. The mobile app enables recording arrivals, departures, lunch breaks, and sick leave. It also allows field clock-ins from remote locations. Managers can schedule work on the go for easier planning and payroll. Employees can also see personal equipment, materials, tools, record fueling, and note if they are using a vehicle.
Link account / sign in
- Install the mobile app (Android/iOS).
- Enter the tenant name (usually your company name; it also defines the URL to the web system, e.g., company.relayplan.app).
- Sign in with the same email as on the web app and the password set by your admin (or by you for your employees).
Register hours in the field
- Start the workday with one tap.
- Log lunch with one tap (the system records 30 minutes automatically).
- End the workday with one tap.
- Edit the current day manually if needed.
- Review your own hours.
- Choose language.
- Soon Request vacation
- Soon Mark sick leave
- Soon Log fueling
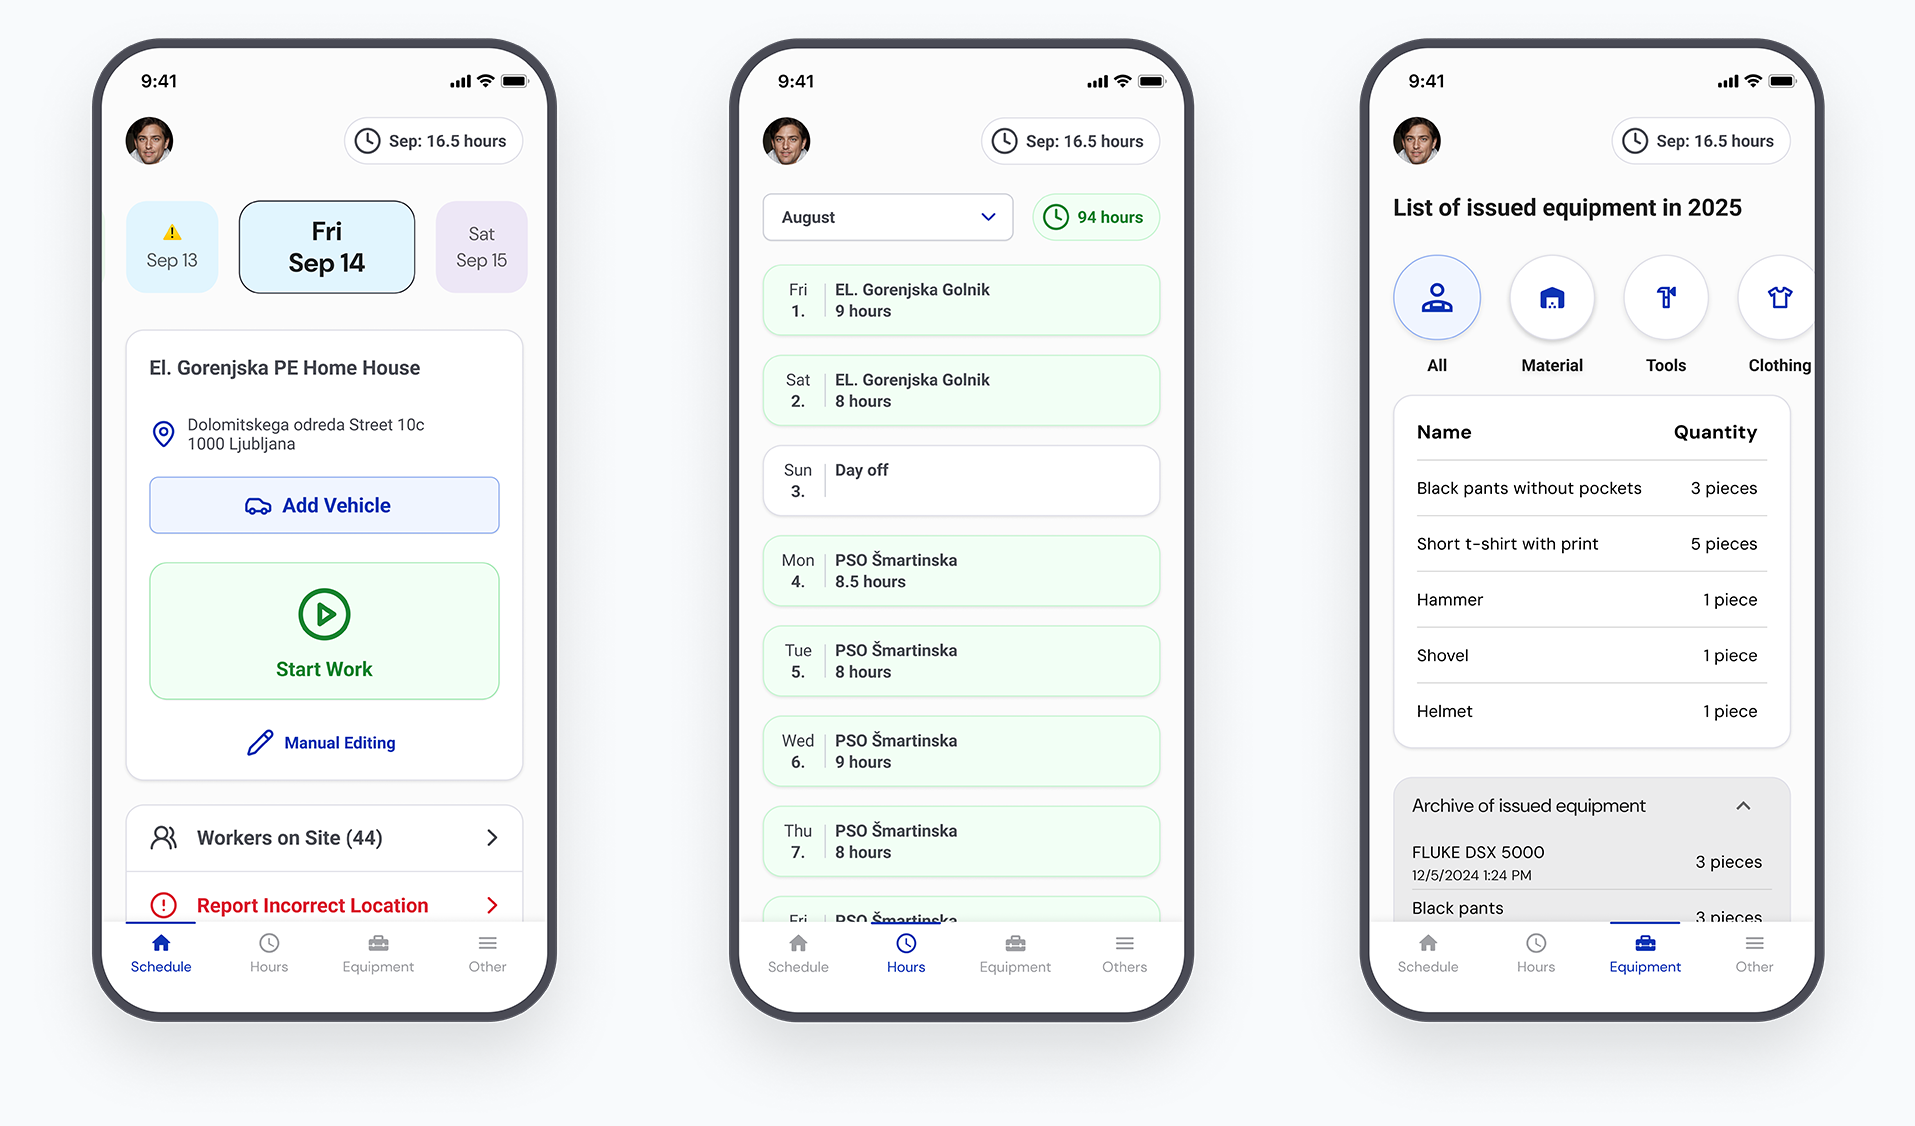 Mobile app
Download mobile app


Glossary
- Project – synonym for cost center in RelayPlan; in this documentation we use the term cost center.
- Cost center – work unit for tracking costs, hours, and materials (project).
- PPE – personal protective equipment.
- Partial write-off – gradual consumption of material.
- Transfer – move material between warehouses or to a cost center.